EditShare®, a technology leader that enables storytellers to create and manage collaborative media workflows, today announced it has entered into a definitive agreement to merge with Shift Media, a leading cloud-native video solution provider that helps creators manage, present, and collaborate on their high value projects. The combined business will operate as EditShare, with Shift Media’s well-known products – MediaSilo, Wiredrive, and Screeners.com – folding under the EditShare corporate brand.
Over the past several years, video creation has continued to accelerate in myriad industries globally, including entertainment, advertising, corporate communications, higher education, house of worship, and many more. Corresponding with this increase in content production, an explosion in video technology has occurred, leaving video professionals with an ever-growing, complicated stack of tools and vendors to integrate to get their jobs done effectively. The combination of EditShare and Shift Media will deliver a comprehensive, open solution that enables creative teams and content creators to seamlessly store, edit, collaborate, and share their content, whether they choose to work on-premise, in the cloud, or with a hybrid solution.
EditShare’s high-performance workflow focused product suite includes EFS media optimized shared storage and FLOW intelligent media management. In 2022, the company launched EditShare FLEX built on AWS, ensuring professional production and post companies can build remote and collaborative workflows that suit their creative and commercial needs.
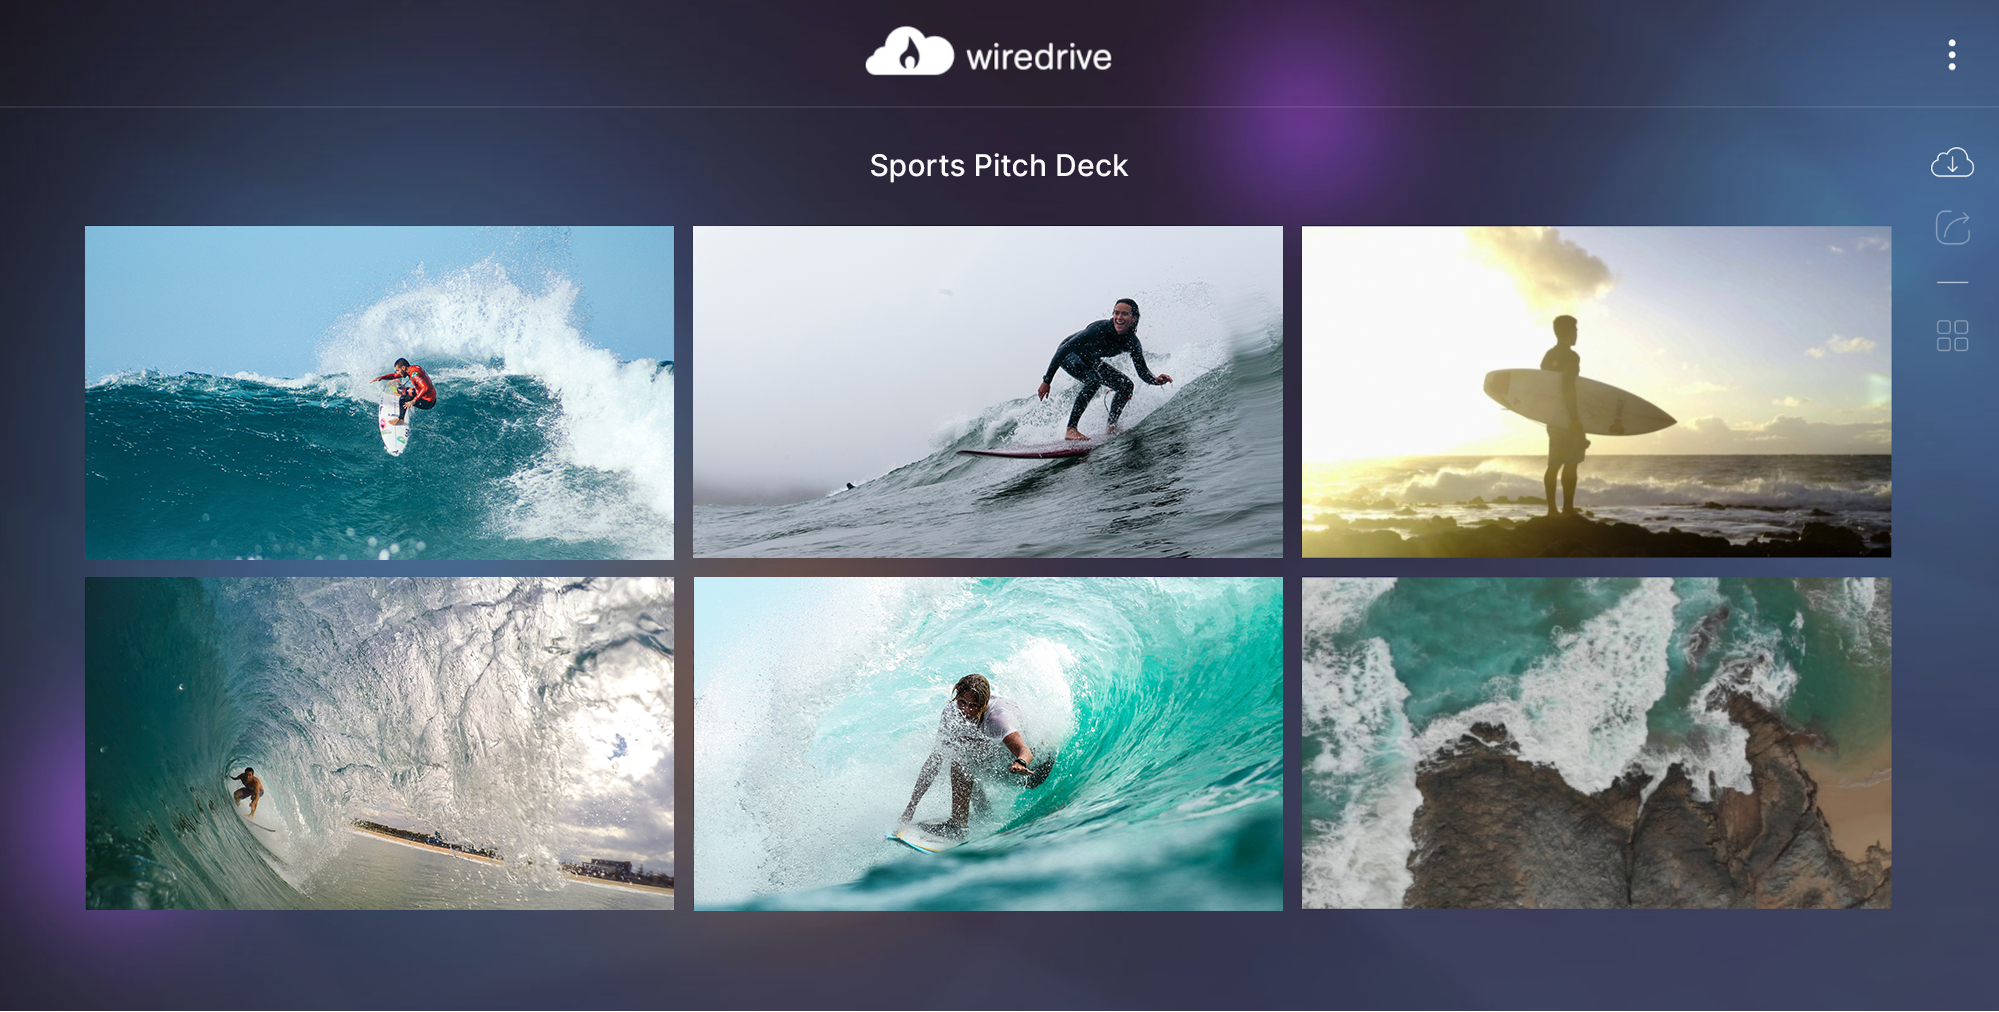
Shift Media’s cloud-native, software-as-a-service solutions include MediaSilo, Wiredrive and Screeners.com. MediaSilo provides a video collaboration HQ, helping the biggest names in media get projects approved faster. Wiredrive helps commercial production companies and agencies quickly and easily create custom pitch materials and showreels. Screeners.com provides the industry standard virtual screening experience for press review and sales opportunities of high value pre-release content.
Ramu Potarazu, Shift Media’s CEO, will lead the combined company under the EditShare banner following the close of the transaction; current EditShare CEO Conrad Clemson will leave the business to pursue other opportunities. “The tireless work of Conrad and the EditShare team has put us in a position of strength for the future,” Potarazu said. “Shift Media was built on the principle that video workflow technology should be completely intuitive and customer friendly. EditShare and Shift Media are highly complementary businesses with market leading products and services and shared commitment to putting the power of video production in the hands of creators. As a combined company, we will create a one-stop shop with a more comprehensive range of products and global network of channel partners, enabling us to better meet our customer needs around the world.”
“Our two companies have very strong businesses and powerful product offerings,” said Stephen Tallamy, CTO of EditShare. “Together, we will be better positioned to deliver a powerful, comprehensive, and intuitive content management and collaboration offering to the broad middle market, which is where most of the industry sits.”
ParkerGale Capital and Marlin Equity Partners, previous backers of EditShare and Shift, respectively, will maintain their positions as primary investors and board members of the combined company. “I’m excited that Marlin Equity Partners and ParkerGale will continue to support the business,” said Potarazu. “Together, we are aligned on delivering cutting edge solutions in response to the stratospheric growth in video production and continued move towards flexible, collaborative on-premise, hybrid, and cloud workflows.”
For more information on all EditShare solutions, please visit the website at www.editshare.com. Information on MediaSilo, Wiredrive, and Screeners.com can be found at www.shiftmedia.io.
MediaSilo allows for easy management of your media files, seamless collaboration for critical feedback, and out-of-the-box synchronization with your timeline for efficient changes. See how MediaSilo is powering modern post-production workflows with a 14-day free trial.
With nearly 200 worldwide events and tournaments every year, each demanding massive amounts of data, our client in global action sports has no time for spotty platform performance or delays. Filming extreme sporting events results in dozens of terabytes of video content. These assets include once-in-a-lifetime record-breaking moments used in live streams, social and web content, and highlight packages on both owned channels and with media partners. This content keeps their 7.3 million social media fans up-to-date on the athletes they love and, in turn, increases engagement, brand loyalty and profits. When you’re distributing footage of a world-class athlete making history with a flawlessly performed stunt, a gap in content is not an option. They needed a reliable, secure solution that fit into their existing pipeline, integrated with their production applications and kept track of multiple revisions.
Wiredrive features comprehensive and intuitive analytics reporting.
Frustrated over the lack of a standard content management system and platform, the Head of Post Production for the property contacted Shift Media for a solution. They had hundreds of users needing a standardized workflow. Confusion and lack of consistency between key video production stakeholders caused by disparate file management systems were tremendous problems. The fact that they held events worldwide only added a layer of difficulty to their existing workflow, with unreliable internet connections and services making the distribution of assets back and forth to the United States incredibly challenging and time-consuming.
Secure media sharing for marketing teams, agencies and production companies.
They required performance at the highest level, and Wiredrive delivered. The solution allowed for the management of all work-in-progress and finished assets from one common collaboration hub. Handling file transfers globally with consistent coverage at all live events accelerated delivery timelines, making assets available to the entire global-wide team, who could download them instantly for upload to their website or social media channels. With a single platform, our customer replaced several solutions in asset management and content presentation while increasing their digital presence and driving the sport forward.
Wiredrive enabled them to simplify their media delivery workflow and eliminate the threat of missing deadlines, giving them peace of mind to focus on growing their global community and creating best-in-class stories for their audience.
Learn how Wiredrive can enable your creative process with a free 7-day trial.
We can all relate to this experience: You are looking for a particular photo, document, or video that you’ve saved somewhere on your computer.
You open one folder … then another … then another.
Was the file in the “website” folder? No, go back to the last one. Maybe you put it in the “July” folder because that’s when you shot the footage? Not there either.
If you are using a digital asset management system to store and organize all of your assets, then you already have a basic organization system in place. Despite this, your design team may still not be operating at its full potential, wasting valuable time hunting for files and juggling version control.
That’s where combining the use of projects and folders with tagging comes in, enhancing the overall organization and management of your digital assets.
How Tagging Enhances Digital Asset Organization
Here’s another example: What happens when you need to find your team’s electronic press kits stored in various projects? Or all photos of one specific product taken on different days for use in different campaigns?
If your projects and folders are stored in a cloud platform, such as Google Drive, your team can be left searching every folder for each account, struggling to make a general file management system work for your specialized digital asset needs.
That’s where a customized tagging system for digital asset management and design team collaboration can prevent a time-intensive hunt for your content. Instead, your team can use specific keywords to organize, tag, and quickly search for all of your assets.
Getting Started with Tagging
With the right tools and platform, it’s easy to implement tagging into your digital asset organization. Here’s how:
1. Make a plan.
Before you jump in and start adding tags to all of your files, it’s important to map out a strategy. If you are dealing with a large number of files, or sharing a system that will be accessible to colleagues and collaborators, making a comprehensive plan is vital.
Start by thinking about the types of files you have in your account and how your projects are currently set up. This will help you determine what kind of categories your tags might fall under and where the gaps are in your current project and folder structure.
Depending on your specific workflow, here are some helpful ways to think about organizing your files.
Other examples of tags can include:
The status of an asset, such as “pre-production,” “production,” and “post-production”
The location where the photo or video was taken
The names of the actors or models appearing in the shot
A ranking system to note a director’s or editor’s favorite selections
The notation of “final” on a document that has gone through all revisions
The primary colors or shades appearing in an image
Whatever the tagging system, it has to work for you and your team so it remains consistent and continues to be used.
Retail or Brand Asset Management
There can also be tags specific to your industry. For example, if your company sells products directly to consumers online or in storefronts, a tag structure can include:
High-level tags: website, print, storefront, e-commerce, social media, model, packshot
More specific tags: product name, SKU number, seasonal campaign, model name, specific social platforms, primary colors
Media and Entertainment Production
Production companies working on film, television, or online video projects could use:
High-level tags: film or show name, scene number, date of production, director’s name, stage of production
More specific tags: location, take number, names of actors, director’s ranking
Advertising and Marketing Campaigns
Creative, production, or marketing teams that work on advertising campaigns with a variety of clients, brands, and products could use this structure:
High-level tags: logo, product name, specific campaign, brand or client name, date of production
More specific tags: primary colors, subjects, themes, specific social platforms, launch or release dates
2. Tag your assets.
Once you have a plan, document it, share it, and then start tagging!
Begin by uploading your content (videos, photos, audio, documents, and more) into your workspace and setting up a basic organization system. With MediaSilo, this process is easy; just create a new project with folders and individual assets inside each to suit your specific needs.
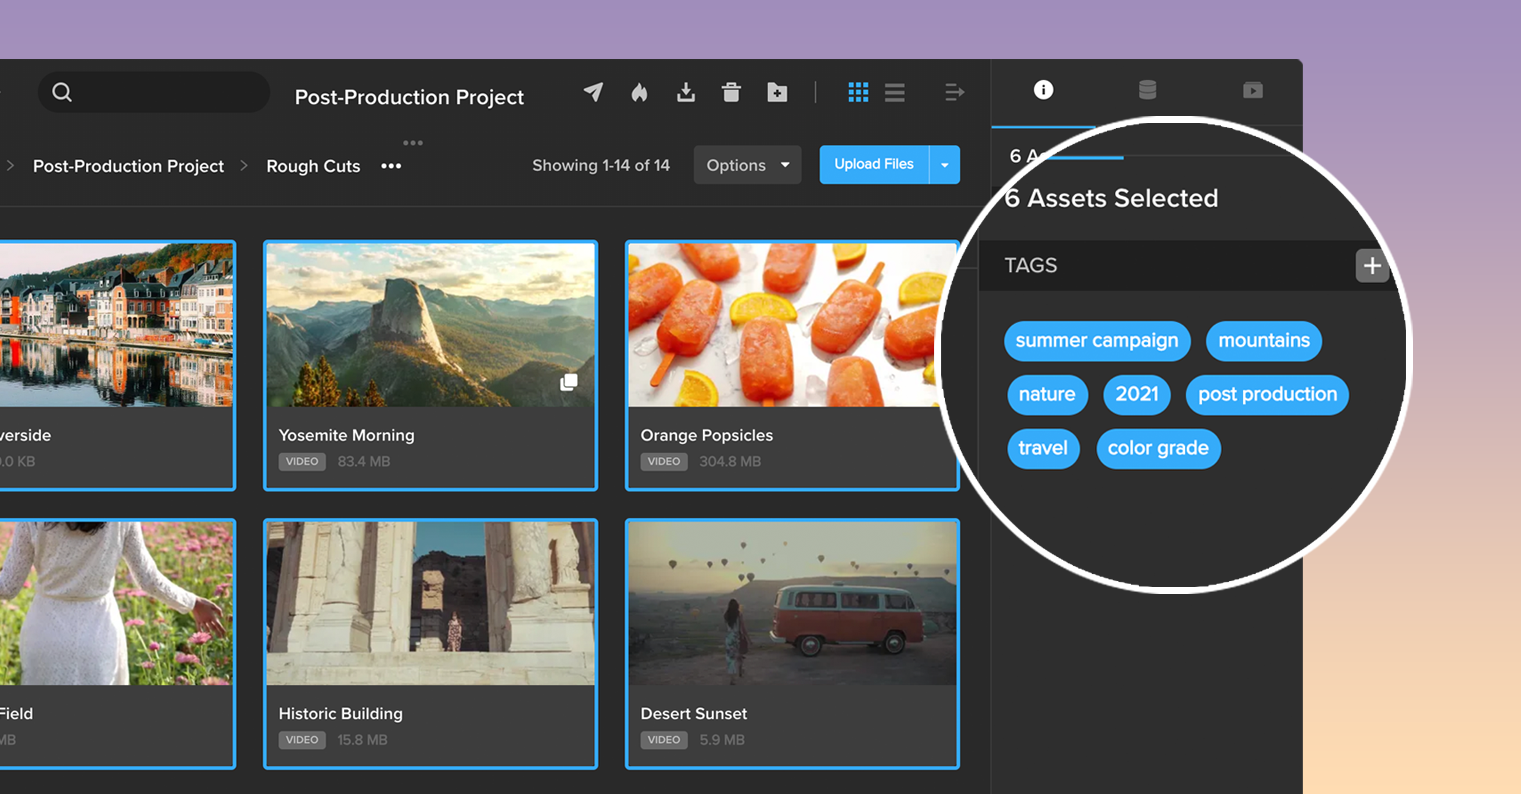
Once your content is uploaded, you can start adding tags immediately. Within MediaSilo, select any asset or multiple assets and open the right-side drawer. MediaSilo even allows your team to either tag assets individually or highlight and bulk-tag multiple items to quickly and efficiently label what you need after uploading.
3. Search for assets by tag.
Once all of your assets are tagged, use the global search in MediaSilo to drill down to exactly what you need without navigating through layers of folder tree structures.
Filters such as asset type (video, image, document), date uploaded, and who it was uploaded by add specificity to your search in conjunction with your added tags.
With MediaSilo, you can even create your own custom search by selecting a combination of search terms to find the specific assets you need in just a few clicks. You can also choose to save the search to use it again and again.
4. Share searchable asset libraries using MediaSilo’s Spotlight.
Looking to make your assets accessible outside of MediaSilo? Tagging can help with this process too.
With Spotlight, MediaSilo’s turnkey presentation builder, you can easily share projects, folders, or a curated playlist of assets in a branded, searchable asset library.
Either use a preset template with a built-in search bar or add the search element onto your own template design.
You can even customize your Spotlight with multiple pages and tabs, each with as many folders, projects, and playlists needed. From there, you can share it externally, and collaborators can use the built-in search bar to search by title, description, or tag to find what they’re looking for.
Taking Your Digital Asset Organization to the Next Level
Managing your media and assets doesn’t have to be a full-time job. A little bit of strategy and work on the front end can save you hours—and lots of headaches—down the line.
And, with MediaSilo, it’s easy to get started. With just a few simple tags in the search bar, you can always find exactly what you need, whether you have 100 or 100,000 files
Virtual Production rocketed to prominence with the debut of the Disney+ series, The Mandalorian. The team at Lucasfilm placed LED displays behind actors instead of green screens or blue screens. The technique combined video game tech with cutting-edge motion tracking breakthroughs. The result of this combination is known as the LED volume. Today, LED volumes are springing up in studios around the world. What does it take to incorporate this way of storytelling with your own films?
“Visual effects are becoming real-time.”
The big benefit of virtual production is the ability to see the environment on set instead of in your imagination. The actors can meld into their environment easier, and the cameras can capture the “final pixels” in real-time. Working this way requires more pre-production planning. That results in the pre-production, production and post-production teams coming together in ways never before seen.
The real-time aspect here is key. 3D sets can be built and then displayed on the LED volume. Then the camera’s movements are tracked and synced with the display. The frustum is the area of the screen that the camera sees. “Frustum” is one of the buzzwords in virtual production, so you’ll hear it a lot. This area is the part of the screen that gets rendered in real-time and allows for the parallax effect that you would see if the background were a still matte painting. The ability to recreate this effect is much of what makes virtual production so compelling.
LED volumes
The bank of high-resolution LED panels can be large or small. It could be a flat panel or form of a rounded shape with a ceiling and floor. The higher the resolution of the panels, the higher fidelity the image. In Everything Everywhere All at Once, LED panels were used to throw lighting effects on the actress. The filmmakers talk about using a very low-budget version of the technology, but they served the purpose of adding lighting effects to their talent. Even though the LED screens are at an angle, you can see the pixels in the video and recognize that there is a big difference between what they were working with and what is on the stage at Lucasfilm.
Unreal Engine
How do you get the 3D background world onto the LED screen? The most common application for building these real-time worlds is Unreal Engine. Unreal Engine rose to prominence as a tool for building environments in 3D video games. 3D artists can create landscapes that appear photorealistic in the background. Unreal can be used when the shoot is happening on set, or it can build the “first draft” of the background. Then artists may use tools like Houdini to create a final version of the LED volume.
Camera choice
Test, test, test. That seems to be the mantra when choosing a camera for your LED volume shoot. The crew at REMEDY tested out a bunch of high-end cameras and concluded that the RED Komodo and Sony Venice were two of the best.
At the end of the video, the testers commented that they were surprised that the vaunted Alexa 35 ($93K) and RED V-Raptor XL ($40K) exhibited some artifacts. While the $6,000 RED Komodo avoided artifacts like “screen tearing.” This is also known as the “Venetian blinds effect.” The Komodo features a “global shutter.” RED has a little case study on using Komodo with VP. The Sony Venice 2 lacks a global shutter but features an extremely fast readout speed of less than 4ms. (The Venice 1 was used in the test, but it clearly shares a fast readout speed as well) The RED V-Raptor appears to have been tested at the VistaVision size and 8K, which has a 25% slower readout than the Super 35 6K mode.
Another major visual issue is moiré. This effect is seen when a camera focuses on an area with fine detail, and it appears to have rolling lines. Blackmagic Design has recently released an updated version of the 12K camera with an optical low pass filter designed to mitigate this problem.
These kinds of details make virtual production really technical. There are so many factors that have to work together in harmony. It will be really interesting to see if LED screens and the controllers will become optimized for the cameras that are shooting them.
Tracking devices for cameras
An essential ingredient for production with an LED volume is a tracker for your camera movements. The Mo-sys StarTracker often gets the nod as the go-to tracker.
The tracker connects to your camera and communicates the camera’s location to the system. This data allows the frustum to display the proper image. New fluid heads are beginning to come out with tracking information and data connections as well. For instance, Cartoni introduced the e-Maxima encoded head. This feature helps communicate tilt and pan data to the system for even better camera position tracking.
Lens data
Another important factor in achieving the right look is lens data. The focal distance and T-stop information are critical factors for VFX. Cooke’s /i data and Zeiss’ eXtended data technologies record the focus and iris positions. Lens data can also be sent to a wireless lens encoder and funneled into Unreal Engine.
Zeiss recently acquired the camera tracking company N-cam, so it will be exciting to see how these technologies start coming together in a more integrated way. Hopefully, this will lead to some more streamlined camera rigs in the future.
Crewing a shoot
Even though virtual production is a new technology, it is key to have a crew who has both experience and a knack for integrating new technologies. Noah Kadner has been a leading voice in the field of virtual production, and he has a great LinkedIn course that will help you and your team get up to speed with the basics of VP. Noah describes the crew collectively as the “Brain Bar” or the “Volume Control Team.” Team members will do real-time composting, supervise the shoot, or work with the physical LED panels.
Lighting
One of the first questions that people ask is, “Can I use the LED panels to light my actors?” The LED panels can complement your primary lighting, but it doesn’t replace it. The LED panels will do a great job of imparting edge lighting to your subject. And that is a big relief when compared to cleaning up edges on a green screen or dealing with green spills on your actors from the light reflecting off of the green screen. Lighting manufacturers are now using wireless DMX controls to interact with the LED volume. Prolycht has shown off how their app works with their lights to match the ambient lighting of the LED volume. It works with a new adapter from Accsoon and an iOS device. This ingenious combination automates lighting in amazing new ways.
Processing all that data
Puget Systems offers a great summary of the kind of hardware needed to feed 3D worlds to the displays. They recommend AMD CPUs over Intel and the NVIDIA RTX 6000 Ada or GeForce RTX 4090GPUs. When choosing the right GPU for your studio, they note, “If you are dealing with a large LED wall, then the extra VRAM and support for a Quadro Sync card will make the RTX 6000 Ada the clear winner. For a simpler setup, especially a green screen, the GeForce RTX 4090 will likely suffice and save you money.”
Production design and the art department
LED volumes combine digital and practical set design in new ways. You might have a physical piece of furniture in some scenes and then a double of that piece in the 3D world on the LED screen. There are many questions about where the foreground should end and the background should begin. And there’s a dance between who should take the lead when props and set decorations span these two worlds.
The positive result of this situation is that artists who work in production and in post get the opportunity to collaborate in pre-production in brand new ways. Directors can use VR headsets in pre-production to explore the scene. Cinematographers can plan their shots in pre-production and see that on the monitor while they are shooting instead of filling in a green screen with their imagination.
Conclusion
Virtual production offers exciting new possibilities, and it has plenty of technical challenges. It shouldn’t be viewed as a replacement for shooting on location. But it is an amazing tool for bringing the whole production into a single moment or creating a world that would be cost-prohibitive to craft physically. At the same time, AI technology designed to key backgrounds out in scenes without green screens or LED panels is advancing rapidly. All of that makes virtual production an exciting space watch and a genuine advancement in storytelling technology.
MediaSilo allows for easy management of your media files, seamless collaboration for critical feedback, and out-of-the-box synchronization with your timeline for efficient changes. See how MediaSilo is powering modern post-production workflows with a 14-day free trial.
Utilizing the “Workflow Integration” framework within DaVinci Resolve Studio, MediaSilo users can now access the most commonly used features on MediaSilo. Now you can search through your MediaSilo assets, preview and download media, upload revised edits and securely share content – without leaving Resolve!
Search for any assets, folders or projects available to your MediaSilo user account.
Preview and scrub through media before downloading.
Download options include proxy and high-resolution versions of video files – directly into your DaVinci Resolve Media Pool.
Export your DaVinci Resolve Studio Edit page timeline to your team and clients, while automatically uploading to your MediaSilo Project.
Send a Quick Link with security options to team members and clients for review and approval.
All MediaSilo comments on an asset can be downloaded directly into your Resolve timeline.
Versioning allows you to iterate on an edit and track its progress.
Want to see a full demo of the workflow integration? Watch Now.
Like many prominent consumer brands, our client had decided to bring their creative and content production in-house. With the World Federation of Advertisers reporting that moving creative work in-house delivers cost efficiencies greater than 30% in some instances, it’s no wonder that companies have embraced this option. The study also found that the growing number of brands using this strategy experienced 64% better integration and increased brand and business knowledge by 59%.
While this approach allowed our client to grow creatively and control every aspect of their content creation, it also introduced problems that led to a chaotic workflow. Overseeing social and digital content creation for over 300 unique brands while blending traditional production with a new high-tech approach required tight collaboration between internal teams and external freelancers. Using multiple free tools led to confusion over which version of an asset to use and created siloed efforts between the different teams and platforms. Having one platform for work-in-progress assets, one for finished assets and yet another one that allowed freelancers to collaborate led to extremely long review cycles. With no standardized process for content submission and different systems for different parts of their workflow, trying to get timely feedback proved impossible. And when you’re producing over 20,000 assets a year, speed against tight deadlines is vital. The confusion and roadblocks created by their existing workflow caused delays they simply could no longer afford.
After hearing about a colleague’s success with our software, their brand experience team contacted Shift Media, desperate to upgrade their collaboration system for content production. Their main goal was to streamline their previous workflow that siloed work-in-progress, finished assets and freelancers. They needed a standardized process for content submission, a work-in-progress system to organize files, collaborate and share with stakeholders for faster feedback, and they wanted to do it all on a single platform.
They found the perfect solution in MediaSilo, which allowed them to securely manage all video production assets in one common collaboration hub. Freelancers could share content with the internal team and each other instantly, streamlining the review process. They no longer waste time searching for the latest file version or following up with stakeholders, allowing them to increase production with those much-needed manhours. Every file, from concept to delivery, is now easily accessible by the entire team. MediaSilo helped unite all internal and external stakeholders with accelerated delivery timelines and simplified their workflow, providing solutions in asset management, review and approval and content presentation. This increased efficiency allowed them to accelerate production delivery timelines, enabling triple-digit improvement in marketing spend ROI.
With MediaSilo, our client was able to make secure video collaboration easy and eliminate superfluous tools, leading to significant cost savings and giving them back the time and money they needed to focus on cooking up quality content.
MediaSilo allows for easy management of your media files, seamless collaboration for critical feedback, and out-of-the-box synchronization with your timeline for efficient changes. See how MediaSilo is powering modern post-production workflows with a 14-day free trial.
Nowadays, there’s a podcast for just about anything you can think of. No matter how small the niche, chances are someone’s talking about it somewhere on the internet. Naturally, there are hundreds (probably more like thousands) of podcasts out there covering the world of filmmaking. From movie reviews and analyzing the finer details of cinematography to practical tips and advice on production and business, or even inspiring, in-depth interviews with your favorite film director, there’s something for every filmmaker out there.
In fact, you may find yourself a little overwhelmed, spoiled for choice. How do you pick which podcast to listen to? Below, to help get you started and guide you on your audio journey, we’ve listed 15 of the very best filmmaking podcasts in 2023. This is by no means a definitive list and comes in no particular order. If you have other suggestions, we’d love to hear them!
Scriptnotes
Are you a budding screenwriter? This is the podcast for you.
Scriptnotes is hosted by revered screenwriters John August (Go, Charlie’s Angels) and Craig Mazin (Chernobyl, The Last of Us). The duo, evidently bursting with passion for their craft, dive into all kinds of topics, from how to nurture creativity, the realities of the industry and the writing process, practical advice, industry secrets, and some fascinating discussions with other screenwriters. Past guests have included Vince Gilligan (Breaking Bad, Better Call Saul) and Christopher McQuarrie (the Mission Impossible franchise, Top Gun: Maverick). If you’re a screenwriter or filmmaker in general, this is a priceless source of free knowledge and advice from some of the best in the business.
No Film School
Chances are, if you’re researching filmmaking podcasts, the No Film School podcast has cropped up in the search results once or twice, and with good reason.
Think of this as the democratization of filmmaking. As the name may suggest, no longer do you have to go to film school to learn the ropes and make it in Hollywood. The game has changed, and No Film School offers a treasure trove of knowledge, insights and advice for anyone, from beginners to experienced pros. Each episode covers a different aspect of filmmaking, ranging from writing and cinematography to editing and distribution and everything in between. Naturally, there are some great interviews with some of your favorite filmmakers, too. The library of content is a comprehensive one-stop shop for all your filmmaking queries, aimed at helping you achieve your goals no matter where you’ve started.
The Town
Covering breaking industry news and the inner workings of showbiz, The Town is a podcast that’s got its finger on the pulse of Hollywood.
As the former editor of The Hollywood Reporter, host Matt Belloni enjoys access to some of the biggest names of film and television executives and agents. Every Monday, you can tune in to a conversation with Lucas Shah, the well-known industry writer for Bloomberg. Matt also ends every episode with “The Call Sheet,“ where he makes predictions about box office and other industry-related news.
Indie Film Hustle
Filmmaking is not a glamorous business. To make it in Hollywood from humble beginnings is going to take blood, sweat, and tears and the Indie Film Hustle is a podcast that makes sure you know that.
Host and founder Alex Ferrari (having worked on over 1000 projects himself spanning a 25-year career) gives you a very realistic look at what it takes to succeed in the industry, profiling and interviewing people throughout the business from top to bottom, covering all kinds of topics from writing to post-production, distribution and even adapting to industry changes, such as the tumultuous period of the COVID-19 pandemic. Grab a pen and paper because you’ll want to take serious notes.
The A24 Podcast
If the quality of the work produced by the A24 studio is anything to go by, then you already know that this is a podcast worth listening to.
With no fixed host, episodes instead focus on getting two stars together in a room and then letting them discuss…well, whatever they want. Sometimes they know each other and catch up like old friends, and sometimes they’ve never met before. No matter who’s on, it’s always a fun, revealing listen as we learn about the inspiration and anecdotes behind some of the industry’s most famous directors and talented actors. Guests include Martin Scorsese, the Safdie brothers and Oscar winners Michelle Yeoh and Brendan Fraser.
The Wandering DP Podcast
Each and every week, cinematographer and host Patrick O’Sullivan sits down to discuss the latest stories both on- and off-set with some of the world’s best cinematographers. Alongside excellent, in-depth conversations, you’ll find plenty of news, inspiration and updates from all around the photography and cinematography worlds.
If you’re an ambitious DP looking to up your cinematography game, this is the number one podcast for you. Within the library of episodes, you can find plenty of technical knowledge on all kinds of aspects, such as lighting and composition. Depending on the topic, there are even accompanying PDFs with diagrams for you to download and utilize.
Team Deakins
Imagine sitting with one of the greatest cinematographers of all time (Roger Deakins) and picking his brain on the industry. Well, with the Team Deakins podcast, that’s pretty much reality.
Roger Deakins and his collaborator James Ellis Deakins discuss cinematography and the film industry, as well as hosting plenty of talented guests from actors to editors, directors and cinematographers. The best part is that listeners can submit their questions and have them answered by the legend himself.
Unspooled
Using a poll of more than 1500 artists and leaders throughout the filmmaking industry, who chose from a list of 400 movies, the AFI (American Film Institute) has determined a list of the 100 best American movies. In this podcast, hosts Paul Scheer (actor) and Amy Nicholson (film critic) sat down to discuss each and every film on the list — why are they so great? Or perhaps, why are they on this list?
More recently, they’re now generating new lists covering different genres with input from their listeners, covering the key scenes of each film and even getting to chat with the cast and crew. For any cinephile and filmmaker looking to analyze classic movies, this is the perfect listen.
The Director’s Cut
The best thing about filmmaking podcasts is that you can learn and glean so much information from the very best in the business. If you’re an aspiring film director, no podcast is better than The Director’s Cut.
Presented by the DGA (Director’s Guild of America), this podcast delivers amazing in-depth interviews between directors as they come together to discuss their films, careers, and creative perspectives. Quentin Tarantino, Christopher Nolan, James Cameron, Guillermo Del Toro — they’re all here!
Off Camera
Off Camera is a fantastic library of podcast episodes interviewing some of the biggest names in the filmmaking business.
Director and photographer Sam Jones is the host, sitting down for intriguing, often vulnerable, and always honest long-form conversations with the likes of Jake Gyllenhaal, Chadwick Boseman, Constance Wu, and just about any other great actor or director you can name. The show began way back in 2004 and is available in audio, video, and even magazine form.
“We tend to see the people that come on ‘Off Camera’ as artists and craftsmen. We want to know how they do their craft, how they got there, and what makes them keep going to work,” said Sam.
The Business
Whether you’re an indie filmmaker looking to break into Hollywood or a seasoned industry pro, The Business is always a podcast worth tuning in to.
Former NPR Correspondent and current Hollywood Reporter editor Kim Masters gives you a behind-the-scenes look at the engine room of Hollywood — the nitty gritty of what makes it tick. There are great interviews with the biggest names in the business (actors, producers, directors, writers) as well as fresh, new perspectives and insights about the latest goings-on in the industry, meaning you’ll always be up to date. With short runtimes of 20 to 30 minutes, this is a good one to listen to while cleaning the house or making the commute to work.
The Filmcast
Consider yourself a cinephile? If so, The Filmcast (formally The /Filmcast when part of the Slash Film website) is always a great listen.
Movie geeks David Chen, Devindra Hadawar and Jeff Cannata dive deep into the latest films and TV shows, offering up highly entertaining reviews and debates. They regularly chat with guests from all corners of the industry, including film critics, everyday bloggers, film directors and movie stars. This is a great way to find out what critics are thinking and saying about the latest releases, keeping your finger on the pulse of pop culture and perhaps saving yourself a trip to the cinema upon realizing that Fast X probably isn’t worth it and realistically, the franchise should’ve died a long time back…
How did this get made?
On the topic of the Fast and Furious franchise and wondering how terrible movies get made…there’s a podcast for that, too.
Loving a movie because it’s so bad is a genuine thing and there are some great cult classics out there that really do beg the question: how did this get made? This fun podcast sees hosts Paul Scheer, June Diane Raphael and Jason Mantzoukas break down some of the worst movies ever made. Just because a movie is bad doesn’t mean it’s not worth watching – there are still loads of valuable lessons that can be garnered from it, and this podcast is proof of that. Sometimes they’ll even bring on guests like Seth Rogen and Evan Goldberg.
Blockbuster
Blockbuster is a slightly different type of filmmaking podcast compared to some of the others listed here, but it’s absolutely worth checking out.
Created in a narrative style format, voice actors guide you through the drama and stories of some of the biggest film directors on the planet. In season one, the podcast focuses on the rise of Steven Spielberg and George Lucas. In season two, James Cameron is in the spotlight. In addition to the narrative drama, there are also plenty of interesting bonus interviews with the crew who worked with James on some of his most iconic films.
You can watch the trailer for season 1 here:
IndieWire Screen Talk
Whether it’s film festivals, new releases, or the future of the industry, IndieWire’s Screen Talk is a podcast that keeps your finger on the pulse.
Hosts Eric Kohn (Indie Wire’s chief film critic) and Anne Thompson (Thompson on Hollywood) get together weekly to review the latest films (both indie hits at film festivals as well as the latest blockbusters), dissect the latest festival news, and chat with plenty of top filmmakers and industry insiders. If you want to keep up with the business and understand where it’s headed, this is a podcast that should be on rotation.
MediaSilo allows for easy management of your media files, seamless collaboration for critical feedback, and out-of-the-box synchronization with your timeline for efficient changes. See how MediaSilo is powering modern post-production workflows with a 14-day free trial.
Discover the tool that will help you get video projects approved faster. Join our Senior Director of Innovation, Michael Kammes, and Senior Customer Success Manager, Christian Blaine, for a demo that takes you through MediaSilo from pre-production to distribution.
Michael: Hello, everyone. Thank you for tuning in today. We have a ton of stuff to show you, and I actually have a guest panelist with me today, which I’ll introduce in just one minute. But I want to talk about why we’re doing this webinar.
As some of you may know, I’ve been at Shift Media for about a year now. And what I hear all the time is MediaSilo is only for review and approve. Like, when I go to conferences, and I talk to people, or I’m on sales calls, it’s “We want to see how you do review and approve.”
And that’s great. That’s one of the core concepts, one of the core tenants of what MediaSilo does, but it’s only a portion. There are so many other things that we do that we’ve got to bust this myth. It’s not only for review and approve. Review and approve is complimentary to all the other things that MediaSilo does in the lifecycle of media.
So what I’d like to do to illustrate that is bring in Christian Blaine. Christian, how are you doing?
Michael: Christian is our Senior Customer Success Manager. Christian knows more about MediaSilo than I’ll ever know, and there is no one better to take us through where MediaSilo fits in in the whole, as they say, media supply chain, and how it can be used for your project, not only in post-production for review and approve, but also things like pre-production or even sales and marketing. So we’re gonna have a little bit of back and forth, but let’s get started.
So, Christian, we’ll show everyone exactly what you’re going to talk about next. And that is going to be our timeline. Right? And not the timeline in our NLE. I’m talking about the timeline for your media lifecycle. We’re talking about pre-production, and then everything in post-production, and then sales and marketing.
So the first thing that Christian’s going to cover are things like utilizing MediaSilo for concept art, storyboards, location scouting. All the things that come into play before someone yells role on set. So at this point, I’m gonna say, Christian, why don’t you share your screen and show us just how MediaSilo can be used in pre-production?
Christian: Sure. Thanks, Michael.
So what you’re seeing here is our MediaSilo platform on a browser. I’m using Chrome today. But we do have a desktop app for Windows and Mac.
I’m going to pick on one of the pre-production points that Michael has just mentioned. I’ll do location scouting. So virtually, let’s say I’ve added our location scout to our system here. We actually have a mobile app for our iOS and Android phones. You can actually, based on the permission set, view the projects and view the access there. But in the location scouting example, we have somebody in the field, and they’re actually uploading as they’re taking photos and videos straight to it and here at the head office.
I’m gonna go ahead and open this up, and you can see here our location scout has already uploaded a bunch of videos that they’ve already taken straight in and added to our location scouting project here. So one may be the head office, and now we’re going through the files here, and maybe we wanna make some notes for the location scout. So I’m gonna click on this first image here. So I can just initially start viewing things, but if I wanted to add additional notes, we actually have an internal review mode that the team can do.
So let’s pretend our director wants this as an opening shot. And maybe I’m a line producer, and I’m actually also a part of this and looking at it. And we can have a collaborative effort here and make additional notes to check our budget – “We’ll check our budget for a day shoot.” And I can continue going through the various assets here.
Let’s pick this video file. And here’s a video file that our team took. It’s a time-lapse video overlooking a highway, and maybe I want to make a general comment here, “Let’s go here on week four in our production.” And you can see here on the right it’s gonna start collecting all the notes that we’re making and the feedback with this asset. And I can delete. I could edit. But being able to reply to other people’s comments is really helpful here, just like in the line producer example. Maybe they wanted to approve that. We’re good to go to do this location scouting. And we can continue on just making additional notes on all the locations that our location scout has already grabbed.
And that’s just a quick brief overview of the internal review. So this is prior to going outside of the system. This is just our team looking at the location scouting.
And casting is another example, of course, for pre-production that maybe we have casting, and our casting producers all around the country or the world are uploading interviews with people you know, filming things outside of their house. And again, I can utilize this system here to make notes on the potential cast that we’re looking at as well. And I’m gonna send it back to you, Michael.
Michael: Excellent. Thank you, Christian. This is just one portion. Like I said, concept art storyboard scouting that’s only the pre-production part where MediaSilo really shines is when we get into post-production. And not just editorial, not just VFX, but various places.
So as we get into post-production, the first thing that we’re always dealing with are dailies. Right? We’re getting dailies, or we’re getting stuff that was, maybe you shot, maybe stuff that was shot elsewhere, and not only are we dealing with the dailies coming in or the raw footage coming in, we’re also dealing with how do we wrangle all of that? Right? You don’t want to just stick it in the folder on your desktop and rummage through there when you need something. We want to put tags. We want to track. We want to search things. So those are some of the tools that Christian is now gonna show us.
Christian: Right, so back in my project landing page here, we have a dailies folder project ready to go. You can see here our teams have already created some folders for our dailies. I’m going to go ahead and do an upload here. So I’m gonna create a new folder. I’ll just call it the webinar dailies folder.
We do have sort options here as well. So I’m just gonna go ahead and grab a couple of assets here from my computer, but I could actually upload folders, subfolders and assets all within it, or I can just do one at a time. And I could actually drop files at the project level here. I can select it, drop it into a folder, and we do have an interactive project tree that I can actually drop folders in. In this case here, I’m gonna go ahead and enter the dailies. And I’m gonna grab four assets here. I’m gonna go ahead and drop those in.
Michael: Hey, Christian, as I’m looking at these, I see some MP4s. I see some MOVs. Can we upload camera-original files as well?
Christian: Yes, you can. Yeah. So during the upload, we support so many file types and codex and things like that, but with the raw files, you definitely can. Of course, the upload time may take longer than the smaller MP4s that I have uploading here, but yes, definitely, you can upload those raw camera files.
And as it’s going through, we are also doing virus scanning to make sure the files are clean in that capacity. We also are generating two proxies during this upload phase here. So we’re creating a 720 proxy as our low-end proxy, but then we also have a higher-quality proxy. We do have a recommended upload spec, h.264 AAC audio codec, as an example. If it matches our recommended specs, we’ll play the source file resolution, for example, and if it doesn’t match our upload specs, then we’ll create a 1080 proxy in an h.264. So once all the proxies are created and the original files uploaded, you can see here they’re starting to appear, and I can always close this out. I can minimize this. I can always reopen this uploader window as well.
So let me go back since those are still going to be uploading. I’m going to go ahead and pick these two here. So now, with the tagging portion of it, maybe we want to track it. Of course, we have our folder marked that way. I’m going to open our right drawer, which will show our project team, but now with asset information. So once I select an asset, you can see here it’s going to pull base information. I can change how this appears. This is take one.
Say, how it appears in the system, but now we have tags. So I can individually add tags. I can also do bulk tagging here as well. So let’s say we want to track, in this case, camera A on this side. So you can see here with the tag we’ve added camera A, and then in our metadata tab, I can select one. If the file has any metadata, we’ll pull all the general info, in this case, a video, and this is all searchable as well.
But what’s really great is being able to add custom key and value pairs here. So our AC has already uploaded some cameras, noting which camera, what date, maybe location is another one our AC is adding. This one, let’s say it’s New Mexico. And with this key and value pair, you can add as many as you want. What’s great about adding all that information is being able to search for it. All the additional information, they can pull it to locate these assets and use them within it. So you can add as many key and value custom metadata and tags as well, and this is all searchable.
And I did show bulk tagging here. Let me find a group to tag…
Michael: While you’re tracking that down, Christian, I think something that that’s really important that a lot of people don’t know is that many review and approve products out there don’t allow for the flexibility of tagging. They’re only meant to give you codec information and who uploaded it and bitrate, but one of the things that MediaSilo was built on was finding content quicker and organizing easier. And being able to add in all of the custom metadata key and values means you can have almost an infinite amount of tags and predefined tags added to footage added to any content, actually, to find it easier later in the process.
Christian: Exactly.
And now that the AC has uploaded some information to those assets let’s say our producers, our executive producer, whoever would be approving, taking a look at these dailies initially, and maybe going through the different takes that our camera did and maybe wants to track which ones are good takes. So, in this case, let’s say these assets are good takes. So, in this case, maybe our team wants to use something called Good Take. Again, we’ll be able to search for this later.
We also have a playlist option here. This is really for presentations, and you can see here I created a static playlist, and we already have some assets that I’ve already selected. Maybe I’m going to present this to my EP as my initial list. So I can go ahead and just drag these over. So it’s added the additional two.
Another way is you could actually create playlists from a folder or a project. So in this example of the webinar dailies, I could have created a playlist straight from this folder and maybe send that over to the executive producer. And now, as RAC is uploading all those assets and adding additional data, they would be able to track this folder as well. And you can send that as a review link or presentation, but I just wanted to show you ways to track the takes that you like to do the work that needs to happen with those.
Of course, dailies, a lot of times, security is important on that side. So, you could actually watermark this whole project. Every video file has a watermark on it, forensic or disruptive visible watermarking. Right now, we provide custom text, and you can have the name on there or email as well. And then the forensics side, if you do find it on YouTube or something and it was leaked, we could actually analyze that footage and see what the watermark information has on that side.
We will get into reviewing in a little bit here. So I’ll send it over to Michael.
Michael: Thank you, Christian.
Actually, what’s interesting is you covered something that was asked a few minutes ago in the chat, which we’ll cover more of this in the Q&A. But, David, I hope that answered your question about watermarking footage and adding metadata, various metadata fields, as well as graphics, and we can talk more about that during the Q&A.
So if we continue down the yellow brick post road, we’re now at the kind of editorial portion. And the editorial portion is where I think a lot of people in chat are probably most familiar. This is where we’re talking about video editing, the creative storytelling that’s being done during editorial, the inevitable transcoding, creating a new version of something for someone to view or to post somewhere, and of course file transfers. How are you getting content from on set, which we talked a little bit about? How do we get it from different creatives who are around the globe or maybe just here in LA, and you don’t wanna make that two-hour drive from Los Angeles to Santa Monica? So, we’re going to show a few ways to go about doing this. First, Christian, and then I’m gonna show you some cool tools. You may not have seen up until now. So, Christian, take it away.
Christian: Thank you. So now that we’re in the editorial phase, just a real quick admin function here. Let’s say today my editor has started because this is where, of course, our editor is going to be cutting our footage.
So here, I can do bulk addition. So if we had a team of four editors all joining today, I can enter all their emails. But I’m gonna go ahead and put one of my other emails here just for the sake of this. And you can see, we have different user types, and we have default roles, but you can actually create custom roles as well. So, in this case, an editor, and now I can assign them to different projects. I can also assign to no projects, but in this case, let’s say it’s our post-production team.
And I can continue adding whichever projects this editor needs access to. If there are distribution lists that they need access to. Same with internal user tags for the admin portion if we want to track, let’s say, freelancers versus staff or production. It can utilize as many user tags to help filter your user roster and Spotlight I’ll touch on a little bit later. But in this case, I’m just going to go ahead and add our editor. Now they’ve received an email invite to the system, assigning them to that project.
And just very quickly here, I’ll just show you the custom roles. You can see here all the granular permissions. So you can actually create name roles within your organization that’s going to make the most sense and then just select the permissions that you want, and now you can assign them to that project. And within specifically for the user, that editor example, he might have access to do everything. In this case, the editor tag can do viewing, downloading, editing, uploading, sharing, but maybe we want to assign them to a secondary project. Maybe it’s last season’s show that we did, but they only have view access so they can take a look at all the stuff that we did last year.
So going back, now I’m gonna put on my editor hat. So I have access. Of course, this is my admin. So I see everything, but this editor right now would only see the one project that I assigned to that person.
So now, in this case, if I’m ready to start working, maybe I need to start downloading. I can go ahead and view the files, or I can just select all the files here. I can lasso them up, maybe it’s these, and go ahead and right-click. As you can see, we have two options. I can download the original source file, or I can even download the proxies to cut with rather than downloading the raw file. So they do have options in this method here.
Or if in the dailies folder, if they had to pick and choose everything, and this is where that collection bin might be helpful going into day one, grabbing a few files, going into day seven, grabbing a few files. So different ways for that editor to grab those files. Of course, if I didn’t assign them within this account, I can actually send a review link to the assets I want my editor to have with the download enabled, and then they would be able to pull down the files via a review link as well.
Michael: Hey, Christian. Quick question for you. Quite frequently, when you’re working with proxies that we’re linking to high-res media, you need to have some metadata that is retained. And as I understand it, timecode and other inherent metadata translates from the camera originals to the proxies. So if you edit with a proxy, you can more easily relink to the high-res later on in the post process.
Christian: Yes. Of course, you could, as long as no one’s going in and editing the names on your remove that file or someone deleted it by the time you’re ready to uprise. But, yeah, if you’re downloading all the files are there throughout the whole project, then, yeah, you’d be able to find the same assets. And with that, I will hand it back to Michael.
Michael: Thank you. And before we move on from this portion, I did want to cover some things that you may not know about. So I’m going to go to one of our demos.
First off, we’ve had a panel inside, Adobe Premiere and After Effects in Photoshop and Illustrator, for years now. And this allows you to get almost the exact same functionality that you would have in our web browser but directly in the application. So this means you can log in with your MediaSilo account through MFA, multi-factor authentication. This allows you to search any of the workspaces and projects that you have access to. It allows you to preview clips. It allows you to download those clips. It allows you to obviously search for clips. You can also upload content and add custom metadata. So it gets uploaded in the right place with the right comments or the right content, and you can also send out review links, which we’re gonna cover in just one moment, for review and approve.
But what we also have that you may not be aware of is we have that same functionality inside Resolve Studio. Resolve Studio, not the free version, the paid version, is something we’re in beta on right now, and I’ll have the ability for you to sign up to be one of our beta testers if you’d like. But this allows the same functionality inside Resolve Studio utilizing their workflow integration toolset, allows you to go through all of your assets and projects on MediaSilo, localize that content, search for content, localize it, upload it, add comments, add share links, etcetera. So all that functionality is about the same between the Adobe panel and the Resolve Studio panel.
We also have a partnership with Telestream. So the ContentAgent software, there was a question and chat about at what point we can upload to MediaSilo. Can we do it immediately from set? And the answer is yes. You can certainly do that utilizing our uploader.
Or if you’re using a transcoder, like Telestream, who makes ContentAgent, among others, we’re actually a node directly within ContentAgent. So you can set MediaSilo as a destination, and you can also map metadata to the metadata fields inside MediaSilo. So any of the content that is sitting and being accessed by a workflow inside ContentAgent can be directly mapped to MediaSilo.
Also, for file transfers, MediaSilo has a fantastic file transfer tool. It allows you to upload multiple files concurrently from a local source. You can also give other folks permission if they are on your account to download content or to upload content, but sometimes you need just a little bit more horsepower, and that’s where MASV comes into play – MASV.io. They will transfer files even faster than we will, and they have a great feature called Portals, where you can send someone a link to a web page, and the end user can drag and drop content on the web page, and it will get ingested directly into MediaSilo. There’s also a great tool that maps metadata with MASV. So if you are moving from an asset management system or some other provider where you’ve entered in custom metadata, there’s actually a way to map that metadata. So that’s another reason you may want to look into MASV.
So moving on, if we jump back to the post process, we’ve just wrapped up editorial. Well, we’ve wrapped up some features of editorial. Now we’re getting into the heart, right? The heart of what we do, which is the review and approve process, and we can accomplish that in a number of ways. So I’m going to invite Christian to come back. And Christian, I would love for you to be able to talk about doing on-demand review and approve.
Christian: Sure thing. Alright. So our editor has completed our rough cut for our first episode here. So they’ve uploaded it into our project folder. And now, if I’m just going to switch gears, and let’s say I’m our post coordinator or post supervisor that may be sending the cut out. So I’m going to go ahead and move this into our cut folder. And here we go, and I can continue. You could see here. I could have utilized the project tree because it is interactive, and I could drop it into this way as well. There we go. Now, we’re ready to share this out. So I’m going to go ahead and right-click and select review link.
And if I want notifications, I could turn this on. I’ll get notified when people view it. If I have download turned on or if I have feedback turned on, I’d be notified of that. What you see here is a default that the admin can select in your workspace. So our account here, this is our default settings, but upon the share, I can update it as needed. I’m going to go ahead and turn download off on this one.
And in terms of the security settings, in terms of this review link, there are three different ways I can structure this. I could do a public link, one URL that everyone would access. I can password-protect it. So before they can view anything, they have to enter that password. And then, finally, we have workspace users. So workspace users basically forces that recipient to log in to your account to be able to view, and that’s where that no project assignment when I added the editor, you would assign, let’s say, the external person at node projects, but they’re forced to log in before they can view the content. So I’m going to do a public link for this and [set expiration] at three days.
And one additional note is with the feedback, I’m gonna leave the feedback tools on for this link. We have a way to have a private conversation between the sender and the specific group I’m sending it to. Or if I turn this off, those internal notes, for example, those dailies that we were making notes on. I can actually send these assets out, and the recipients would also see all the internal notes that our team did. And then, once feedback is collected on this review link, anybody’s comments would filter all the way back to the asset. So, in this case, I’ll keep this as a private conversation just specifically for this link, and in terms of security, this is one where, I think I mentioned earlier, you could set it at the project level. So every video asset is watermarked. But maybe on this show, we don’t need the watermarking on everything, but in this shot here, we have something very sensitive, so we do want to just watermark this one. I’m gonna go ahead and do a public watermark with just some custom text.
And I’ll keep this as public, and I’ll go ahead and create the link. And by default, it’s copying it to my clipboard. I’m going to go ahead and pass this to Shanna, who will forward it to everybody on the call here. Yeah, feel free to open that review link. I’m going open it on my side as well.
When you attempt to create feedback, you’ll experience that first time if you weren’t a reviewer, for a reviewer account. Basically, we just need some information, name, email, to be able to collect that feedback and then put it with the asset there.
So you can follow along, and this one will have watermarking. And we do have a secondary way to send it. I can do a send link. And now this is via email via our system. I can change the subject line. I can add a body of the email here, and then we also have a recipient list. Now I can be very specific about who I add. In this case, maybe I just add the dailies group, and I can add additional emails in here, whoever needs to access it. And I can actually edit and save distribution lists.
So, in this case, here, as a post super, I have my night AEs sending out cuts. I have my coordinator sending out cuts sometimes. So I can share this distro list with everybody on the account. I can keep it just for myself if I’m the one sharing it or selected users, and now I can enter AE information or my coordinator, and they would be able to access the exact distro list that I’m maintaining on the backend side.
I’m going to go ahead and send this one out as well this way. And let me pull up that review link I just sent so I can access it via our feed, our inbox. Here’s the one I just sent. I’m going to go ahead and open this up. You can see here we have our audience, we have our feed, and Michael’s already making comments. And this is where now we get into the collaborative effort.
Let’s say our executive producer or our editor was on this. In this case, the editor [writes], “Yes, as best as possible.” We also have little checkboxes. So if the editor was on this link and they wanted to use this as a checklist, I can go ahead and resolve those once it’s done, and I can continue on.
So we have various tools here, [you can change] how you want to see that timecode. We do have playback. So this one is just one asset here, but if I had multiple, I can select how I want to review all the assets. Playback speed, so if legal is taking a look at our cut and has to go through, find little logos or things that we need to blur out. They can actually slow it down or speed it up if they want. It depends on how they want to view it. And, of course, our audio. And then we have four- or five-second back review tools. We have QC mask that you can overlay just to see what it looks like in maybe a vertical keyboard shortcut as well as full screen, but I’m going to go ahead and play this file.
And let’s say we wanted to start here. Now I’m the executive producer, and I have some notes as well. [Writing notes] “Start here for Act 1.” And this blue toggle denotes that I’m going to pull the timecode with that. You can see here I’ll have the timecode move forward a little bit. We also have a markup tool within MediaSilo. So the example of that legal, let me see… I’ll pick on these logos here. So if I’m legal, I put my legal hat on, I can select our paintbrush tool, select a color, and I’m going to do yellow. I circle and note, “Will need to blur.”
And I can continue going that way with our markup tool. We have eraser tools as well. And maybe at the end, if somebody has a general comment that they wanna make, I can just deselect that timecode. [Writes] “Let’s meet tomorrow to discuss notes.”
And once comments are made, there are different ways to filter and sort them. I can also click on various comments, and it’ll go straight to that location, that frame within the timeline here. Duration of this file, and I can just bounce around that way.
We also have an approval button, so maybe we needed to approve one of our other EPs on the show. The co-EP approved it without any notes. You can see here there’s a little check mark. Our co-EP has approved this. They’re okay with everything that’s alre
Text-based editing powered by AI is taking the post-production world by storm. Adobe and Blackmagic Design announced that their respective editing apps would showcase it as a built-in feature. Text-based editing uses artificial intelligence to produce a transcript of your videos that provides a way to edit the video by selecting text. Time savings is the major advantage of text-based editing, especially for documentaries and interviews. The Lumberjack system introduced AI-powered text-based editing scenes several years ago for Final Cut Pro, so the big news is that DaVinci Resolve and Premiere Pro now have it built in. But we’ll look at each system’s strengths and weaknesses so that you can decide which tool is right for your workflow.
The case for text-based editing
The script lays out the story for narrative films and TV shows. AVID’s Media Composer features ScriptSync to help editors match their edits to the shooting script. Their PhraseFind feature then allows you to search your audio clips and find just what you are looking for. But non-scripted shows like reality TV and documentaries operate in reverse. The final “script,” as it were, is really the byproduct of the editing process. It’s even been recognized that documentary editors are writers. Documentaries often cull together an enormous amount of interviews. Those interviews often overlap on common subjects. Those subjects form the building blocks of the film’s story. So there was a real need for more powerful and more cost-effective solutions for text-based editing.
It should be noted that there’s a huge amount of buzz regarding “Text-to-video” tools like Runway. That tool uses AI to create video clips from text prompts. “Text-based editing” uses AI to create a transcript from a video, like an interview. Then you use that transcript to edit your video together by pulling together important clips. These clips might come from a single interview or multiple interviews.
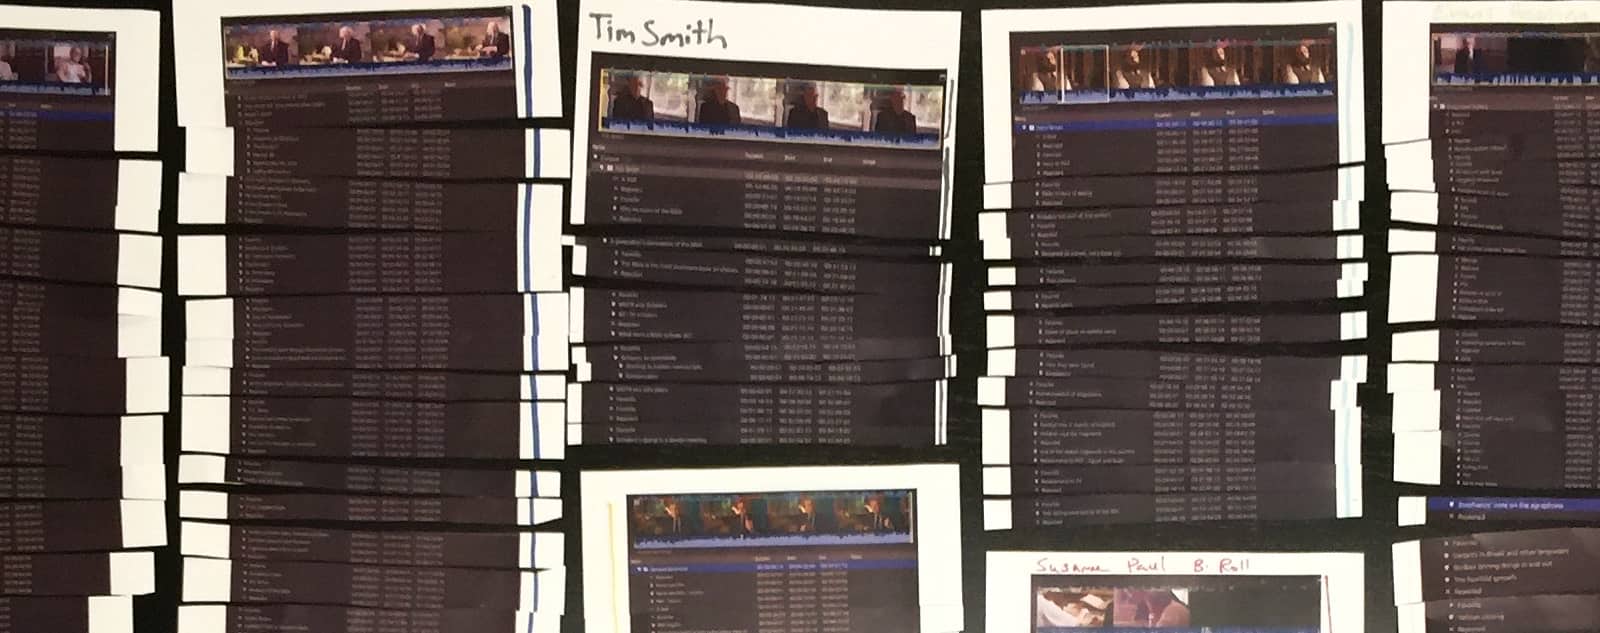
A “paper edit” is the product of using transcripts of interviews printed out on paper to craft an edit. This is the analog method of “text-based” editing. You can actually cut up the portions of the interviews and lay them out, and then group them by topic. This sounds archaic, but it can really help you to see the full story. Another version of the paper edit is to print out a list of markers from the interviews summarizing each point and interviewee discussed. Here’s an example of a paper edit from the 2017 documentary Fragments of Truth.
Paper edit from the Fragments of Truth documentary (2017, Reuben Evans)
In this example, each of the markers was typed out after a portion of an interview had been watched. Then the markers were printed out, and cards were made that listed the common subjects. Those became the building blocks for the film.
Paper edit from the Fragments of Truth documentary (2017, Reuben Evans)
As you can see, this process could benefit greatly from some technological improvements. This is one area where artificial intelligence can shave days, if not weeks, off the time it takes to log and organize your footage.
Those improvements took center stage at NAB 2023 when Adobe and Blackmagic Design announced that text-based editing would ship with their NLEs. You just have to love Adobe’s marketing tagline for Text-based editing, “No more paper cuts.”
DaVinci Resolve
Blackmagic Design included text-based editing in the DaVinci Resolve 18.5 beta. It brings the basics of text-based editing to DaVinci Resolve Studio ($295). Blackmagic calls it “Speech to Text.”
DaVinci Resolve Speech to Text (Blackmagic Design, 2023)
Resolve can automatically create transcripts for you using AI. It will identify silent portions of your clips as well. Simply select a clip in your media bin and click the “Transcribe Audio” button. Resolve will transcribe the text and note silent portions with ellipses. When you highlight the text of your transcription, Resolve will highlight that portion of your clip in the timeline. Resolve can use that transcription to create captions for your video as well. The YouTube channel “Creative Video Tips” has a great tutorial on Speech to Text editing in DaVinci Resolve.
You can see in the video that Resolve only addresses a couple of aspects of text-based editing. The reviewer is having to implement a “hack” where he is using one timeline to organize clips and another to do his edit. That other timeline functions like the “organization cards” in a paper edit. That makes DaVinci Resolve’s implementation pretty good for a single interview or a short video. But it falls a bit short of indexing and organizing the contents of an entire film because it doesn’t incorporate some key metadata. Identifying who is saying what in a documentary interview is highly beneficial. For instance, you may have a host appear in multiple locations or several speakers in a single interview.
Premiere Pro
Just a few days before Blackmagic Design announced Speech to Text, Adobe announced, “Premiere Pro is the only professional editing software to incorporate Text-Based Editing.” While that claim didn’t last long, Adobe’s implementation did go further than Blackmagic’s feature. Premiere Pro automatically transcribes clips and produces captions. Importantly, it allows you to identify the speakers.
It would be nice to see some more advanced tools when it comes to identifying speakers. Currently, the editor has to go through each phrase and identify the speaker. Adobe has shown off the ability for it to identify speakers, but they haven’t shipped that feature to beta yet.
Premiere’s text-based workflow adds a couple of other important features as well. Editors can import a transcript that has been created through a service like Rev.com, and you can associate that transcript with the clip. This is handy if your audio has technical words or foreign languages.
Adobe Premiere Pro Text-based editing, 2023 Adobe
Editors can export the transcripts that Premiere provides as well. This adds value to the transcripts because those transcripts can be uploaded to social media sites along with the video for increased SEO performance.
Both Premiere Pro and DaVinci Resolve allow you to insert clips from the transcription window. You can identify silent sections in your clips in both NLEs.
Adobe also provides a workspace for text-based editing in Premiere, making the feature feel more refined than Blackmagic’s implementation. It feels like Adobe has laid the foundation for more functionality in this workspace in the future. But currently, it is still limited in its ability to function as an organizational tool for a film with common topics across multiple speakers, as is the case with most non-scripted work. So Premiere appears to have the upper hand when it comes to built-in integration.
Lumberjack Builder
In 2018, Philip Hodgets from Intelligent Assistance presented Lumberjack Builder. When you organize footage, it is known as “logging” footage, hence the name Lumberjack.
Lumberjack then grew into a whole suite of logging and editing tools, culminating in the release of their new Lumberjack Builder NLE. Originally released for FCP, the Lumberjack system also works with Premiere Pro. It was the first system to connect AI for transcription with an editing interface and the first text-based editing tool.
Lumberjack combines transcription with keywords and other metadata that allow you to organize an entire project’s worth of footage and cull it together into an actual text-based edit. This comes from a deep understanding of the purpose of a paper edit. It is designed to work with keywords across clips the way an editor uses cards for organizing when doing a paper edit.
The key difference here is that Resolve and Premiere use the text as a “source,” but the “destination” is still the timeline. You read the words in the “source,” but you have to listen in the “destination.” Whereas, Lumberjack features the same interface when you are working through your source interviews or the timeline that you are assembling. The editor is working with blocks of text. This makes it a powerful tool for documentary filmmakers.
For films in languages other than English, Lumberjack offers 16 languages for free. And it integrates with a third-party transcription service for another 50 languages at 25 cents a minute.
Finally, Lumberjack offers real-time logging for interviews with their iOS app. The app enables metadata tagging by people, locations, or other key topics right on set. When combined with AI transcription and text-based editing, it’s a powerful solution. When the editor has finished their “paper edit” in Lumberjack, just send it over to FCP or Premiere and start the process of trimming.
Descript
The AI-powered online video editing app, Descript, uses a text-based editing approach as well. It’s designed to be easily accessible for anyone who needs to make simple videos like presentations. Descript also features an audio mode that is designed for podcasters. One of the big features of Descript is that it will help to identify and eliminate “verbal clutter.” Those are the umms and ahhs that we say when we don’t quite know what to say next.
Descript offers “Scenes” as an easy way to insert your b-roll. The editor inserts a slash into the transcript to identify the beginning and end of a scene. And then you just drag a clip or graphic onto that spot.
Descript now has the backing of OpenAI, so it will be really interesting to see what they come up with in the future.
Conclusion
Text-based editing is nothing new in the sense that Intelligent Assistance has been offering it for years. At the same time, it feels totally new, because far more people have accessed it through Resolve and Premiere Pro in the past few weeks than in the past few years. It is a tool that has proven its worth, whether through the old-school paper edit or the latest AI tech. So many AI-powered features will be coming to post-production professionals that it will be hard to keep up. Some will be of dubious usefulness, while others will transform job descriptions overnight. But the best tools will be the ones that empower storytellers to efficiently work their craft so that we can all do more of what we love.
MediaSilo allows for easy management of your media files, seamless collaboration for critical feedback, and out-of-the-box synchronization with your timeline for efficient changes. See how MediaSilo is powering modern post-production workflows with a 14-day free trial.
You turn in your cut and wait for the inevitable notes. “But my cut was amazing; they won’t have any notes…” and then, the email arrives. There are notes. Pages of notes. Some of them in all caps, some of them in bold. Page three even has some pictures. But it’s okay because, as any experienced editor will tell you, the review process is critical to all forms of filmmaking. And most especially so for television.
Television has come a long way. Traditional broadcast television still exists but is far less prominent than it was a decade ago. Streamers have taken over, and while the concept of television has changed slightly, the majority of shows available to audiences are created in a similar manner.
As an editor working on a television or streaming show, you are likely to work on a small team of post-production professionals who intimately understand the show, even when different directors bounce in and out across various episodes.
Being a good communicator
First and foremost, it is crucial to learn to communicate with your team. Not just your assistants, but your Post-Production Supervisor, other editors working on the show, the VFX and sound mix teams, the executives, showrunners and directors.
Editors working in television tend to be in a unique position. They are the shepherds of the show, supporting the vision of not just the director but the overall show itself, from showrunner notes to executive notes. That’s why TV editors, like editors across all mediums, need to be great communicators.
Here is some advice on how you can effectively communicate with your team and guide the process most effectively.
Set your ego aside
Remember that you are there to support the goals of the show. You may have a vastly different personal style than that of the show or the particular director working on an episode with you, but if you always come from a place of supporting the show, you’ll be able to more effectively pitch ideas that resonate with the team.
Be willing to accept any ideas that come your way, not just the ones that you like the most. Being open to hearing the ideas of others and implementing them into your cuts will help your colleagues and collaborators see the vision of the show and push it forward in the review process.
Internal notes vs. network notes
The process of editing a TV show typically looks like this, although every show can be slightly different. First, the editor will deliver a cut. Then the director will have somewhere from two to four days to spend with the editor to deliver a cut that fits their vision. Notes are then given on the cut, and the editor works directly with the show’s producers and showrunner to prepare a cut to share with the network.
Then the network begins sharing their notes. The network notes can vary greatly depending on the show you are on, the relationship that show has with the network, and how much that show fits the network’s brand and goals. You may be collaborating with your showrunner on how to achieve some network notes while pushing back on others. During this process, you’ll be attending tone meetings, which help align all of the creative goals on the production under the guidance of the showrunner.
Remember that during this process, the show is being given notes as a whole. The showrunner is likely feeling stress from the network notes and needs to decide how to achieve them, whether they are going to push the show too far in one direction or another, and whether or not to fight the notes. As an editor, one of the only people who has seen all of the footage forwards and backward, you can help guide this part of the process by being supportive of any internal workflows your showrunner puts in place to help try out ideas. Being open to receiving notes at this time will help you share ideas and concepts with your team that will help them push the show forward to the network at the next screening.
Showing options
If you have done any sort of client work in the past, you might be familiar with the idea of never saying, “No, we can’t do that.” Instead, if you find an idea is asked of you that you don’t agree with or know won’t work, don’t give a firm “no.” Rather, find a way to achieve something similar but different. Present an option and explain why the original note would have been too complex to accomplish. Presenting an option that is exciting and does work is a great way to showcase your talents as an editor but also diplomatically say, “I’m very supportive of this idea, but the idea that you wanted to do would have been too difficult to achieve.”
Nothing can stop a review process in its tracks like simply saying “no.” Saying “no” is an easy way to get told “just do it” and then forcing everyone down a path of resistance that ultimately will not work. If you spin your wheels on an idea for a long time that ultimately you knew wouldn’t work, then all of that time is lost and could have been better spent punching up other parts of the show. Finding a collaborative way to help directors and executives feel that their idea was still heard helps them push the show in a forward direction.
Working with technology
We live in a world full of technology. Whether your editorial team communicates on Slack, Discord or just a lengthy text thread, here are some great technologies that can be utilized to aid in reviewing episodes.
Messaging tools
Your team will likely need to speak to each other often. In today’s world of remote work, it’s entirely possible that many members of your team are in distant places.
Find a communication tool that works for you. Slack and Discord are great options. If your entire show runs on Microsoft products, you might consider Microsoft Teams. For Google Teams, you might consider Google Meet and Spaces. Whatever you choose, make sure that the communication product you use is easy to set up and that everyone can access it both on their computers and mobile devices.
Meeting tools
Just like communication tools, it’s important to get everyone on the same page about how you will be talking to each other. It can be helpful to guide your team to one singular communication tool for having live conversations to cut down on the difficulty of setting up calls. For instance, if your team is used to using Zoom, then use Zoom for everything.
Alternatively, if your team is entirely a Google team, then consider skipping Zoom and relying solely on Google Meet.
The goal is that you can easily say to anyone on the team, “Let’s meet on Zoom,” and they know exactly what you mean. Sometimes you may just have a question or an idea that can be figured out in less than 5 minutes on a call. This can cut down on lengthy back-and-forth emails.
Reviewing
For reviewing scenes or episodes, it’s important to decide on a tool that will help your team all work together. That’s where a platform like MediaSilo comes in. It’s important for your team to always be looking at the same thing and sharing their ideas in a way that is easy for the editor to understand and accomplish.
Tools like MediaSilo can help consolidate feedback, remove the complexity of writing out timecode notes, and make it easier for everyone involved to know when an idea was shared and have a conversation about that idea. Having all of your feedback and approvals in one place helps expedite the review and approval process by keeping everyone on the team aware of any changes that are being made.
Wrapping up
As an editor, you are the only person who has seen every frame of film that was shot. You know the show forwards, backward, and in some cases upside down (depending on if you flipped some shots). It’s up to you to help guide your team to success. Your role goes beyond simply pushing buttons in the Avid; you are there to help guide your team, discuss ideas, manage schedules and ultimately be the one responsible for crafting the flow of the show.
It’s not an easy job. But with good communication skills, you can be highly effective.
MediaSilo allows for easy management of your media files, seamless collaboration for critical feedback, and out-of-the-box synchronization with your timeline for efficient changes. See how MediaSilo is powering modern post-production workflows with a 14-day free trial.