There is no doubt that, with ChatGPT making waves with immediate writing capabilities and stable diffusion enabling creatives to create incredible imagery based on simple prompts, artificial intelligence is the hot topic of the moment. Making sense of it all is quite a challenge, especially for us in the media and entertainment industry.
The talk at the moment is about the “creative” capabilities of AI. But that raises a lot of ethical questions for content producers. Who is in charge of the work? Where are the boundaries between fact and AI generation? What are the intellectual property implications? When AI can create completely convincing images from a brief text description, what is truth, and when does it matter?
These ethical dilemmas can make media businesses a bit uneasy, but let’s not forget that AI can be a lifesaver in some areas. It’s like this: people are great at the fun, creative stuff, while computers excel at the dull, repetitive tasks. AI is just another example of this age-old truth.
It’s all about the metadata
Asset management is the way we find stuff in our content stores. We describe the content using metadata, and the more detailed the metadata, the easier it is to find what we are looking for. Indeed, with really good metadata – and maybe some AI help in the search – we may find content that will take our productions off in a new, unexpected and delightful direction.
At EditShare, we’re all about helping you keep track of your content. Whether you’re producing blockbuster movies or TikTok videos, our FLOW asset management software bundled with our storage systems is the way to go. One fundamental truth with all asset management platforms is the better the metadata the easier it is to find the raw material to tell your story.
The real timesaver: Intelligent software
Completing good, detailed metadata is a time-consuming business and sometimes, it is not an especially rewarding task – which can lead to human fatigue and, in turn, errors. Spending hours or even days in a darkened room manually tagging hours of video can be tough, but it is needed if you want to be sure you can later find the people, places and items you need; to sort the best takes from the OK; to find new and informative B-roll to tell the story.
But computers are good at repetitive tasks, so this is an ideal application for AI. If the software is intelligent enough, it can reliably tag objects, people, locations, and even emotions. It can process audio, transcribe the speech and lock the script to timecode, so that users can quickly jump to the part of the clip they need. Processing audio and video together helps fine tune the script tracking and understanding of emotions.
This all sounds great in theory – a real timesaver at the point of ingest, and throughout the extended life of the content. But can it be done in practice?
FLOW AI for Superhuman Vision
At EditShare the team studied the market, and saw that a start-up based in Berlin had all the right vision coupled with an incredibly powerful technology stack. The company is called Mobius, and their AI platform is called Superhuman Vision, which is pretty much what we wanted to achieve.
Facial recognition
So we have integrated it into our FLOW asset and workflow management system. We call the add-on FLOW AI. It adds yet another layer to our already highly automated environment. FLOW AI can process content for keywords in a scene, automatically tag people based on facial recognition and improve the post environment with intuitive scene and detection algorithms.
One of the operational considerations in AI is that it has to be trained to know what you know. FLOW AI is supplied with a lot of basic knowledge already in its database: as soon as you plug it in it can recognize more than 5000 objects, emotions, actions and even 10,000 famous people. And you can teach it more – you can add people to the database, for instance, and it will index them every time they appear in your archive.
Detailed image analysis
FLOW AI also includes intelligent support when searching for content. User requests can be very specific or quite vague, and the retrieval system will suggest relevant clips beyond the usual, so that stories become more interesting.
Obvious applications are systems with a high throughput of content, like newsrooms and sports broadcasters. Say a golfer hits a hole in one: you can quickly find all the other times this golfer has done it; or it has been achieved on this hole; or even disastrous triple bogeys at the same place.
It is a powerful tool for other users, too. Say you are producing a multi-part drama serial, and you need some cutaways to manage the pace of the story. By framing your request by mood, weather, time of day or people in shot, you can help the editor by offering clips that will match and flow seamlessly. For post houses versioning content for different markets, it can help by identifying the points which may need conformance editing, like nudity or swearing.
The partnership with Mobius is already proving very worthwhile. The algorithms in their software not only save time but offer more accurate, richer results, and as users get into the capabilities of FLOW AI, the benefits continue to grow. Object detection is just one string to our AI capabilities, with other integrations including speech to text and translation, but that’s something for a future blog!
It is said that AI is a powerful tool when used to support human decision-making. That is why we see FLOW AI as a great enhancement for our storytelling platform.
Want to find out more? click here to book a demo, or a chat with your local EditShare team member.
You’re ready to pitch on a big project or new client and want to put your best creative foot forward. But how do you show them your best work in a way that makes them take notice? When it matters most, you want to show a reel that not only makes your company look great but can also be customized to the particular client’s needs, even if it’s on short notice. Here’s how to make that happen.
What Matters When You’re Building Reels In House
Keep It Together
Every additional step it takes to get your work samples onto your finished reel is another obstacle between you and your potential new work.
Think about all the disparate components involved in delivering a video showreel:
Cataloging and storing all the pieces of content you want to include
Choosing and finding the best ones for the particular reel
Gathering them from storage into your reel-building platform
Making sure they’re all in the same correct format
Designing a template or format to showcase them
With all these steps, you must find as streamlined a solution as possible. Since the reel is your primary calling card (tailored, of course, to your prospective client), you’ll want to make it possible to draw from the entire archive of your company’s creative work samples, as well as any job-specific or client-specific creative references and illustrative examples you need. If you need to hunt them down in more than one place and move them to another, you’ve already lost time, and team members may overlook important pieces.
Choose a solution that doesn’t require people to take the media out of various other systems and move it, transfer it, convert it or send it to another system. It should all be ready to go and easy to look through. Once you have a library of all your finished work and other elements uploaded, cataloged, tagged and easy to search, you can easily use it as a resource to create customized pitch reels whenever you need.
Many companies use a variety of different tools to present and share their work, but very few are comprehensive solutions and many require a significant amount of oversight and expertise to keep track of and run smoothly. The multi-tool approach requires numerous steps to collect assets and deliver a polished reel. It also means paying multiple monthly fees for different tools and multiple storage costs and licenses across those tools. It also creates more moving parts that can potentially fail when you need them.
Instead, look into building a setup that combines all of these functions in a single place so that everything is compatible, easy to find and ensures your presentations are consistent and reliable.
Keep It Simple (But Attractive)
You want tools that are simple enough that anyone can easily create a reel when prospective clients want to see one. And “anyone” could even mean a junior staffer who happens to get a reel request when everyone is out of the office. One of the main reasons to bring your reel-building in-house, in addition to cost savings, is the ability to turn things around quickly. Your responsiveness alone—along with your ability to turn around a beautiful presentation quickly—will make a strong impression from the start and potentially get you the chance to compete for projects you might have missed out on otherwise.
Make it easy for salespeople and technophobes to pitch your company’s services by finding a solution with premade templates, customizable design themes, and drag-and-drop presentation-building features now available on many modern platforms. The most efficient in-house reel-building systems don’t demand tech or editing skills, nor require you to hire someone especially to manage the solution. You’ll save lots of money and time by choosing a platform that doesn’t require heavy training, a systems background, coding knowledge or substantial IT support.
Use these features to create a consistent and appealing look, and then make it standard for all your presentations. A unified look is a sign of professionalism. The ability to simply plug in an asset and have it “just work” saves many nail-biting hours otherwise spent struggling with incompatible file formats, overcomplicated editing software, and painstaking creative guidelines. Since you’re selling your creativity and taste, it’s important to keep in mind that every presentation you send out represents your company’s creative standards, even if it wasn’t put together by an art director or designer.
If there’s any caution that must be taken around allowing business development people, sales reps, producers, and other non-creatives to build effective creative reels, it’s that you have to create firm standards for your presentations in advance. There should be fixed guidelines for what your materials look like and a system for making attractive showcases that consistently represent your company’s brand while incorporating your prospective client’s. You want to avoid forcing individual users into making their own design decisions on the fly. That’s a recipe for quickly turning a potentially captivating portfolio into an embarrassment. Set up templates that fit the image you want, and then apply those templates automatically to any reels or presentations that go out for any purpose. It will make you look professional, regardless of your company’s size.
Technology Is Your Friend
While the process of creating and sending out reels may be mired in the past, technology has provided a host of advanced tools that can help you make your reels work even harder for you. You can use tech to up your new business game if you take full advantage of the tools available.
Make sure your reel-building solution offers robust data reporting built-in, so you can make better, faster and more effective decisions about how to follow up on the presentations and reels you’ve sent out. The available resources these days go way beyond the basic Google Analytics codes used on the showcase pages of yesteryear. Beyond basic viewing stats, you can eliminate uncertainty around the business development process by knowing not just whether your reel was viewed (or wasn’t) but also when it was watched, whether and how widely it was shared, which parts the client viewed, how long they spent on each part and which bits they viewed more than once. That definitely can help you decide what should go on each reel and if you’re likely to get their business or at least attract their interest. You can even use it for A/B testing to determine what performs best and what to include on future reels. All of these types of insights can signal interest, consideration and the urgency of a decision. Finding this type of solution can help you make better, more profitable new business decisions.
The right technology also helps keep things under (digital) lock and key. All clients like to know that their valuable work is safe and can’t be accessed randomly. Since you’re usually using existing clients’ work to attract new ones, you want to be respectful of your existing clients when you show their work to new prospects. By doing that, you’re also letting your new prospects know that you’ll take the same care with any work you create for them. Unlike showcase websites and traditional asset storage solutions, modern asset management and reel-building systems can also offer higher-tech security features, like watermarking and personal access codes. Once your materials are uploaded, you can make sure that only the people you want can access your files and view your reels. This allows you to show new work to potential clients even if it’s not yet ready to be viewed by a wide audience. And it lets you privately and safely share your other clients’ work without compromising their business. You also don’t have to settle for old-school basic protections like passwords if you feel you need a higher level of security. Some platforms offer more advanced multi-factor security and even integrate it with their analytics so you can keep track of who is seeing your work in real time.
Make Your Next Pitch A Fast One
The arduous process of finding new clients and bidding on their work isn’t going away any time soon. But with tools that let you quickly put your prospective clients front and center – using the beautiful work you’ve already created – you can get on the shortlist and possibly even short-circuit the process of winning more work.
Want to learn more? Watch the webinar now!
Learn how Wiredrive can enable your creative process with a free 7-day trial.
At the end of 2022, we surveyed 367 Shift Media customers in the film and television industry on their workflow to gather insights on the latest trends from pre- to post-production. The goal was to help others better understand the opportunities and challenges our industry has overcome recently.
Just as the pandemic brought new ways of doing business, so does the challenging economic climate we face going into 2023. As budgets face scrutiny and managing costs becomes more of a priority, streamlining processes with more comprehensive solutions will be more important than ever.
Read the Full Report Now
Who We Surveyed
Key Insights from the report
Remote Work Is Here To Stay
The challenging economic climate in 2023 will bring new challenges that require streamlining processes with more comprehensive solutions, with many still working from home.
*Fully or Semi-Remote.
Uplift In Virtual Production Projects
Production teams have adapted to having fewer people on hand and learned to lean on virtual tools for remote production. Here are the tools that they use most:
*Participants were allowed to choose more than one response. OTHER includes: Frame, Airtable, Frankie
Distribution Workflows Require A Digital First Approach
Streamlining processes is essential as the need to create high-quality content at a fast pace increases in demand.
“We get as much done in pre-pro to prep for production, so things go more smoothly. Using tools such as MediaSilo and Asana, we’re able to access any assets or briefs we might need.”
Read the full Video Production Workflow Report
MediaSilo allows for easy management of your media files, seamless collaboration for critical feedback and out of the box synchronization with your timeline for efficient changes. See how MediaSilo is powering modern post production workflows with a 14-day free trial.
Technology has the ability to shape the way we work, sometimes for the better, sometimes for the worse. With the introduction of new technology, such as cloud-enabled editorial tools, it can be an opportunity to consider a better way of working.
The Evolution of Video Workflows: From Bespoke Hardware to Cloud Operations
It is worth reminding ourselves that up until maybe 10 years ago, all the equipment we needed for media production depended upon bespoke hardware. You bought a box to do a job, and your workflows were defined by the boxes you owned and how you connected them together. That applied whether you were shooting in the field, in the studio, or in post.
The twin-pronged revolution came when processing power developed to be able to handle video in real time, and when standards were established to share content as data files, replacing SDI (which of course also required bespoke hardware). By opening the option to use standard hardware and open standards, video workflows became more accessible and the ability to process video in software made these workflows more flexible.
Virtualizing Post Tools: The Benefits of Cloud Editing
The next step was to virtualize the software, and build systems on microservices. In simple terms, we have moved from connecting boxes that we happen to have into assembling the precise functionality we need, in precisely the order we need. With the infinite scalability of the cloud, the architecture can flex to do what we want without the requirement for large capital investment.
And that is why we have the opportunity to take a completely fresh approach. We need to decide what it is we are actually trying to achieve, and how best to do it.
Take editing, for example. Online editing has meant a largish room in a post house, with room for clients to sit around. That costs a lot in real estate, and power, and catering, and security, on top of the salary for a top editor and the cost of the equipment.
It is the way we have always done it, because it was the only way we could make it work. But if we are starting with a blank sheet of paper, is it the best way?
Collaborating Remotely: Enhancing Productivity and Saving Time and Money
At EditShare we talk a lot about how post tools, like editing, can be virtualized alongside the storage network and asset management platform. These are the industry standard tools that editors expect: tools from Avid, Adobe, DaVinci and others. With remote desktop access technology such as PCoverIP, the editor will work exactly the way they are used to, whether the processing and storage is in the machine room in the basement or in an AWS data centre hundreds or thousands of kilometres away.
The logical extension of that is that the editor doesn’t have to be in the expensive edit suite in the city centre post house. They can be anywhere which is convenient for them. The idea of editing high-value content on someone’s kitchen table has always been a security nightmare, but with cloud editing the video never leaves the central, controlled environment in the cloud.
But of course an editor rarely works in complete isolation. Producers and clients want to know what is going on, and directors may well want creative input. That is why the expensive edit suites have large couches for all these collaborators. And having everyone in the room may be right for some projects.
But for others, producers, directors and other collaborators will need to understand progress and approve material, without watching the whole process. With cloud-based tools it is easy for remote contributors to securely access proxy versions of rushes and cuts for comment. . If you need real time collaboration, there is no reason why you cannot use Zoom as the communication tool.
That saves time for producers and the rest, who are not sitting around while the dull parts of the job happen. They focus their attention where it matters most. And they save time and money by not travelling to the post house.
Balancing Work and Life: The Importance of Staff Welfare in Cloud Operations
The travel point is becoming increasingly important. Commuting every day, only to sit alone in a darkened room until late into the evening to meet a deadline can be demotivating and sap creativity and productivity. Connecting with people in person undoubtedly improves a quality of life, so it’s a balance of travelling when it counts. With the ability to start work in one location and continue somewhere else helps address work/life balance whilst still keeping to commitments. .
The cloud could, and should, be transformative for video creatives. It should be boosting staff welfare, business economics, and creative collaboration. That is why it is important to draw up a list of what is important to your facility, and fit the technology around it.
Want to find out more? click here to book a demo, or a chat with your local EditShare team member.
When you’re in a business like EditShare, the start of a new year means the time to think about what is going to be important in the coming 12 months. What are users going to talk about, what capabilities are they going to need, how will they challenge us?
Here is my view: this is going to be the year that hybrid production comes to maturity. Hybrid in the sense that it will be part on location, part remote; part using traditional tools onsite and part in the cloud.
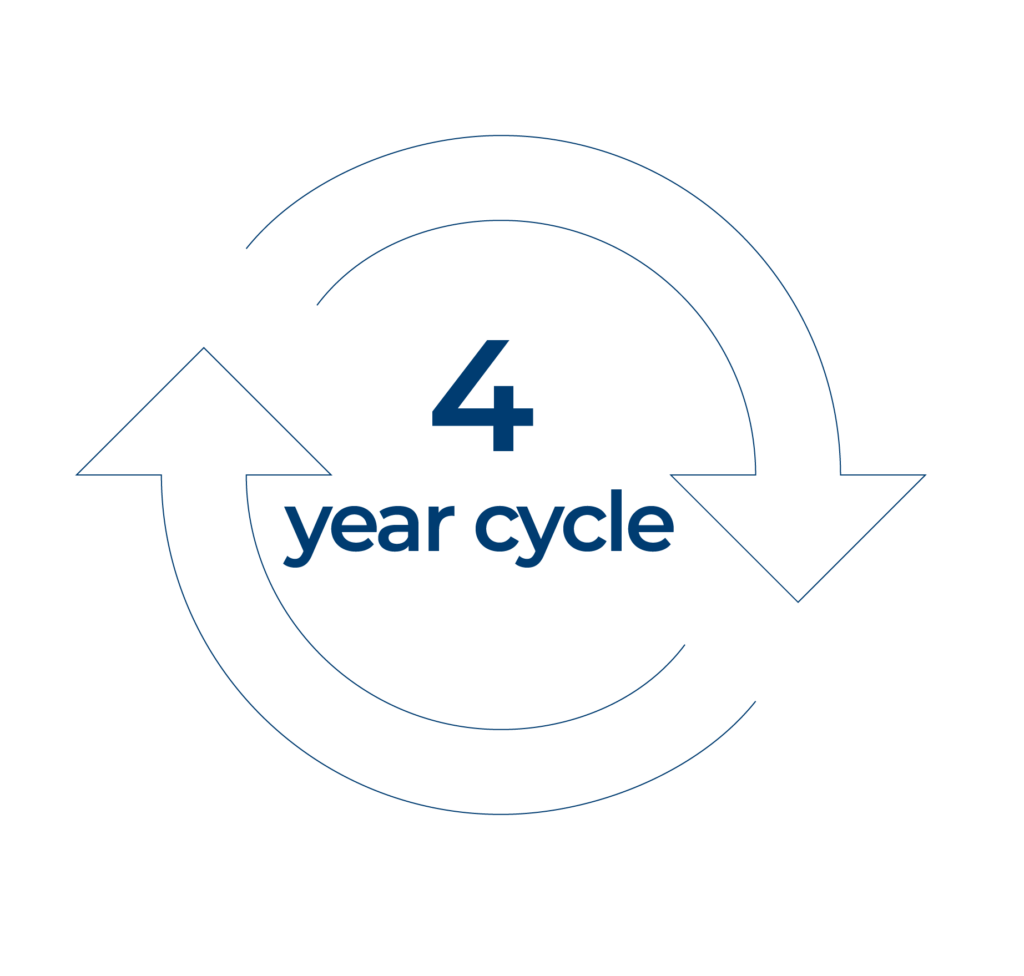
Why 2023?
Before I explain why I think it is going to be important, let me just say why 2023 is the year when it is going to happen.
In media, we have a well-established four year cycle, driven by external forces, mainly sport. In 2024 and every four years from then on we have the Olympics (and a US presidential election). In 2026 and every four years we have the Winter Olympics plus the FIFA World Cup. In 2025 we have the European football championships. But in the other year of the four year cycle – like 2023 – we do not have any big events. So we have time to think, to develop sensible plans.
Think about this: there is no one size fits all post production workflow. If you are making a nature documentary you may be accumulating footage over years; but investigative journalism might be shooting almost up to the time of transmission. Movies will allow months for post production; sports broadcasters will want a fresh highlights package every time there is a break in play.
If you are planning a major sports event like the Olympics, or a major location-shot reality show that needs daily coverage, do you want to ship your post production team off to the location – where you will have to build facilities and pay for food and accommodation – or do you want to keep them back at base where they have set up their rooms just as they like them, and they know the quickest route to the best coffee shops?
Fast connectivity has changed everything
There are no right answers to any of these questions. But what has happened is that we have built workflows because, in the past, they were the only way that the technology allowed us to work. Now, thanks to fast connectivity around the world, we can take a step back and decide what is the best way to work on each individual project.
The cloud, of course, is central to all of this. That is not to say that it is compulsory: there will be plenty of workflows where traditional, in-place post is the best solution. The major nature documentary series I talked about earlier is a good example: getting all the content to a post facility for editing and finishing at a considered pace is probably the way to go (although you might want a security archive in AWS S3).
But if you do put all your content in the cloud, then you can access it from anywhere. You can call up processing resources when you need them, for instance for batch creation of proxies, or to do large-scale transcoding.
The real transformative technology, though, is cloud editing. All your media is in the cloud, as is all the metadata. With EditShare FLEX, you can host the edit software – whichever platform is your preference – within the storage network. If the post-production storage network is in the cloud, so too is your edit software. Remote desktop technologies like PC-over-IP (PCoIP) means you have the look and feel of a traditional edit suite, but it is all happening at some distant location.
You can access huge resources without the cost or time of moving large amounts of content. With good, automated proxy generation you can work with even a modest broadband connection.
Cloud editing is not for everyone, or for every project. That is not the point. What it does is open up new avenues and new workflows. You can take a step back and decide what is the best way for you to work on this particular project: what is best for staff welfare, for business economics, and for creative collaboration. Workflows your way.
One of the first things any post professional needs to get a handle on is the concept of a “codec.” Short for “code/decode,” a codec is the method that is used to write your video and usually audio into a file.
The analogy I find most helpful when talking about codecs is that of a language. You have an idea, and you can write that idea down in Hindu or Swahili or Cantonese. With video, you have an image, and you need to record it; you can also record it in any of a variety of codecs, depending on what you are hoping to do with that image and who you need to communicate with.
Codecs Vs. Wrappers
One of the first questions that come up is often, “oh, is a codec the difference between .mp4 and .mov and .mxf?” Actually, those aren’t codecs. Those are wrappers. If we want to continue our language analogy, you can think of those like the format of a written document. You can have a German language magazine or a Ukrainian magazine, but both are magazines. Or you can have a Ukrainian magazine and a Ukrainian book; both are Ukrainian but in different wrappers.
Codecs and Wrappers work the same way. You can have an H.264 (one of the common video release codecs) that you write into a .mp4 file, a .mov file or a .mxf file. It’s still written in the same language (in this case, H.264), but you put it in a different format depending on your use. In this case, MXF (media exchange format) is the most robust professional format, while MOV is an older QuickTime movie format, and MP4 is a popular consumer format. Something like YouTube accepts all three, but your phone is unlikely to be able to play an MXF file, while it’ll almost definitely play an MP4.
What Are You Using the Codec For?
We broadly divide up the uses of codecs into three categories: capture formats, intermediate (or editing) formats, and release formats. All of these tasks for a codec have different jobs, so we use different technology to achieve that job.
The job of a capture format is to capture as much of the on-set information as possible. You want the brightest brights and the darkest darks and the full range of colors in front of you captured as best you can. The job of an intermediate codec is to be easy to work with; you want your editing process to feel easy, with applications opening quickly, timelines whizzing by, and quick exports for client approval. For final release, the goal is different; the file will generally only be played linearly (forward from beginning to end), without skimming or image manipulation, so all you care about is making the best-looking image in the smallest file possible.
These are all different tasks, so we often use different codecs, or different flavors of codecs, to achieve them.
Download our free Guide to Codecs now.
At the capture stage, we frequently use either RAW formats, which aren’t even really codecs, or larger codecs with high bitrates to capture all the possible scene information. The bitrate of a codec refers to how many Mbs are allocated per second to create the image, with more Mbs offering higher quality images. There are capture formats that are close to 2000 Mb/s for 4k video capture, which can quickly fill up a hard drive and can be too onerous for even powerful computer systems to easily deal with.
This is a great time to remember the difference between Mb and MB: Mb is “megabits,” while MB is “megabytes.” Megabits are usually used for datarates of something happening in real-time (like uploading/downloading data or playing files), while Megabytes (and the larger gigabytes and terabytes) are used for data storage. Bits and Bytes aren’t equal: a byte is 8 bits. That means a 2000 Mb/s file capture format works out to around 250 MB/s.
To make matters worse, since we do multiple different things with files, you’ll often see their data rates written in different ways. For instance, intermediate codecs will often talk about quality in terms of MB/s, while a release codec like H.264 will often be discussed in terms of Mb/s. If you think about it, it makes sense since the intermediate codec will be taking up storage space on your hard drive, while that H.264 will be streaming over the internet, but it can take a second to get used to.
RAW
RAW isn’t a codec since it isn’t even video yet; it hasn’t gone through the “codec” step of “code/decode.” RAW formats take the RAW sensor data, unprocessed, and compress it. It still needs to go through all of the processing to even make it a usable video file.
Because of the unprocessed nature of RAW files and the massive file sizes of capture video codecs, as soon as we get into post, the first step is often doing a demosaic (sometimes called a debayer). This process takes a video file from one format (RAW) and translates it (there is our language analogy again) into a codec for use in editing. You don’t have to worry too much about this transcode process since we generally reconnect back to those original video files for our final color grade, so image quality loss in this transcode isn’t a major deal.
The Intermediate Codec
We then get to edit our smaller files wrapped up in a more manageable codec, usually with a data rate under 200 Mb/s (25MB/s), sometimes even down around 100 Mb/s or less (12MB/s). This makes life much, much easier while you are editing since the computer has to bring much smaller files “live” into memory while you are working, and your edit process can feel smooth and painless instead of slow and tortuous.
Another major feature of editing codecs is that they typically focus on intra-frame encoding instead of inter-frame encoding. This means that the compression they apply (and all the video we ever work with has some compression) is applied one frame at a time instead of looking at multiple frames and encoding them together. Intra means “inside,” and you can think of this as each frame is only compressed “inside” itself. With inter-frame encoding, the encoding is spread between frames.
Inter-frame encoding, sometimes called Long GOP encoding (for Group of Pictures), is wonderful for a final release format, like a file you put up on YouTube. But it’s very frustrating in post-production since you are going to be moving forwards and backward and scrubbing over clips quite a bit. To do that with a Long GOP codec, the computer has to constantly be looking at all the frames around an individual frame in order to “draw” that frame accurately.
With intra-frame encoding, the computer has to do a lot less work. Every time you land on a frame in your timeline, the computer only has to look at one individual set of data, one frame, to “draw” the frame on your screen. It’s much easier on the processor and makes for a faster edit process. Once you add a cut, with intra-frame encoding, you are A-OK. With inter-frame encoding, the computer still has to keep referencing those other frames outside the timeline to draw that frame.
The big codecs that are used in editing (Apple ProRes and Avid DNxHR) use intra-frame encoding and are available at a variety of bitrates, so you can choose a reliable codec for easy editing at a bitrate that fits the power of your editing workstations and the available space in your storage.
Online & Release
After you edit, you reconnect to your capture format, whether it was RAW or a larger capture codec, and do your online color grading session. Typically this requires a more powerful machine since you are working with the larger capture formats that were used on set. From there, you’ll transcode the movie into your release codecs.
This typically involves a larger file (something like a ProRes 4444 XQ file or similar) that will become your master file and will be delivered to your client and a smaller file for web delivery. That web delivery file is where a Long GOP codec like H.264 becomes a great fit. Since it’ll be watched linearly, the image benefits of Long GOP compression will outweigh the drawbacks.
Check out our handy guide on the most common codecs for a better understanding of how they work and how they fit into your post workflow.
MediaSilo allows for easy management of your media files, seamless collaboration for critical feedback and out of the box synchronization with your timeline for efficient changes. See how MediaSilo is powering modern post production workflows with a 14-day free trial.
Our Senior Director of Innovation, Michael Kammes, recently sat down with Richard Sanchez to talk about his work as a visual effect and assistant editor. Richard has assisted on the films “Robin Hood” and “Naked“, the television series “The Good Place” and “I’m Dying Up Here.” More recently, he was the visual effects editor on “Bill & Ted Face The Music” and “She-Hulk: Attorney At Law” for Marvel Studios. As co-creator of Master the Workflow, Richard provides in-depth training and information for aspiring film and television editors.
In this interview, they discuss why you need VFX turnovers, collaborative workflow between teams and demystify conflated VFX terms. Richard walks through his process and gives aspiring VFX editors a preview of what they will learn in his Master the Workflow course.
MediaSilo allows for easy management of your media files, seamless collaboration for critical feedback and out of the box synchronization with your timeline for efficient changes. See how MediaSilo is powering modern post production workflows with a 14-day free trial.
As anyone who’s ever shot any type of film or video project can tell you, filmmaking is a hard and complicated process.
It requires a great deal of planning to put together a script, cast and crew for a short film that you’re looking to shoot with friends over the weekend. It’s difficult for most to even imagine the amount of planning that goes into bigger projects like feature films — or even bigger projects like television shows.
Yet, for years, great showrunners have found ways to pull everyone together and execute on highly complicated programs that shoot several episodes simultaneously while coordinating many different skilled directors, actors and crew.
But how do these showrunners keep everyone on the same page for so many of a project’s style and nuance elements? Well, the answer is often tone meetings. Let’s explore this essential part of any television or streaming show’s success and see how you can facilitate and run tone meetings of your own.
What are tone meetings?
So, what are tone meetings and what are they all about? Well, in short, tone meetings are any production meetings held to help keep different key creative contributors in sync about various creative decisions and aspects.
And while tone meetings can be used for any variety of project types, they’re most often used to help with television or streaming shows as a way to get the myriad of different creative storytellers (like directors, editors and other creative managers) on the same page about certain elements of style, voice, and — well — tone.
For example, showrunners for television shows often hold tone meetings before each season with the different episode directors and editors to share info about the story beats and talk through overarching themes for the season as a way to keep everyone synced together.
Why tone meetings are important.
Generally, the bigger the scope of the project, the more important tone meetings become. And even if you’re working on a small project with a tight group of friends, chances are you’re going to sit down with everyone and explain some of the nuances behind the script and story.
For larger projects requiring many different managers and department heads, the need to keep everyone on the same page becomes even more necessary. After all, you don’t want one director shooting one episode a certain way, then having an editor edit it completely differently.
Tone meetings are a critical part of television production, which showrunners often make a regular part of their process. It helps them keep tabs on how the overarching themes are being treated or developing and allows them to rest assured that their overall creative vision is executed day in and day out.
It’s also worth noting that conflicts can arise on any set, and tone meetings are often the best venue for different parties and departments to come together and air out their disagreements in a safe and supportive space — rather than holding grudges through the rest of production. If you do find yourself in a situation where you’re running tone meetings for your project, don’t be afraid to let people talk freely. Having experience at every level of a production team, I can say that sometimes the most minor roles can give the most impactful feedback.
Tips for running excellent tone meetings.
So now the question becomes, how can you facilitate and run tone meetings for your own projects? In truth, that answer is really up to you and your needs for your show or program. However, while each project will always be different, some steadfast tips for running tone meetings can help you develop your own tone meeting agendas.
Start as early in the creative process as possible
Include only the key creative decision-makers
Take copious notes and track all creative changes for reference later
Check-in as often as necessary to keep everyone informed
Follow up at the end to see how you’ve done
Some showrunners use tone meetings simply as a way to keep their ironclad creative vision steadfastly followed. In contrast, others might use tone meetings as a way to encourage directors and editors to bring their own ideas and visions to the table.
Keeping your tone meetings on track.
We should also talk a bit about how to keep your tone meetings on track. When starting on a production, it can be helpful to outline a timeline for when tone meetings should happen (and be sure to stick to this schedule). For those without tone meeting experience, it’s a good general rule to include tone meetings early and often, after each major stage of production, including scripting, pre-production, production and post-production.
To keep things moving, try to keep the conversations rooted in a shared cadence and language. Like any meeting, tone meetings work best with a clear agenda that outlines who will speak and present information and in what order. Any topics you want to cover can be shared beforehand, letting all parties know what they should bring to discuss.
Ultimately, at the end of the day, tone meetings will only be as successful as the amount of focus and weight you put on them. So make a plan, include your key creative filmmaking allies, and have fun exploring how you can develop and run tone meetings for your own projects, big or small.
MediaSilo allows for easy management of your media files, seamless collaboration for critical feedback and out of the box synchronization with your timeline for efficient changes. See how MediaSilo is powering modern post production workflows with a 14-day free trial.
Every creative team is a bit like “The A-Team.” We’re all specialists who try to be great at what we do. And in a perfect world, our whole team comes together to win the day. While Hannibal may be the team’s leader and signal-caller, everyone has something to add to the equation, and ultimate success wouldn’t be possible without everyone’s contribution. So how can we pitch in and take our shows to the next level? Here are some ways to use your skills to put your mark on a great show while still keeping a cohesive vision.
Understand the strengths and weaknesses of your show’s production pipeline.
The shooting patterns and ways personnel are assigned vary a bit from show to show. And each organizational structure has its strengths and weaknesses. Some shows shoot their episodes individually in the order they will air. Others may produce episodes in blocks, with the same team assigned to all of the episodes in that block.
Each method has its strengths and weaknesses. Producing one episode at a time means that the director can focus completely on that episode, and all of the footage and elements needed will be finished within a fairly narrow window. This can help streamline production and keep things on schedule. It can also allow a director to really put a significant imprint on a particular episode, making it possible to choose a director with the perfect skill set for that episode’s themes and style.
On the other hand, shooting in blocks can give the production team more continuity, with a single director influencing and being exposed to more of the season’s ongoing story. Shooting in blocks also offers some obvious production efficiencies since those episodes can basically be shot like one feature over a period of several weeks. This means that locations that repeatedly appear throughout the block can be scheduled together, and shooting itself can be much more efficient. Editors can also start to assemble the entire story arc that is set to unfold over multiple episodes and make sure that it’s working.
However, shooting in blocks also has its drawbacks. In some cases, an editor may have to wait for critical elements of the episode that airs first because they haven’t yet shot critical scenes that will be done at a later location. Members of the creative team may also be unavailable for specific sessions because the various episodes they’re working on may be at different stages of completion at the same time.
Having a plan that takes advantage of the benefits of your production pipeline while minimizing the potential logistical challenges is really important in keeping things running smoothly and creating the best show you can. A smart production plan can help you avoid potential issues of availability while also maximizing creative continuity.
Use your resources.
With so many people working together to create one final creative product, there are a host of resources to take advantage of. Whether the show is brand new or has been on air for years, there are tools at your disposal that can be used as references. Some of those things are objects or files, show bibles, visual references, notes from tone meetings, and even past episodes.
But there are also human resources that can add a whole layer to the creative process. One important one is the script supervisor. If your first involvement with a project is during post-production, you probably won’t know everything that was discussed on set or everything that happened during the shoot. But you can gain a lot of that knowledge by talking to the script supervisor and reviewing the script notes. There is often a knowledge gap between those who were present at the shoot and those who are using the footage that was captured. The script supervisor and notes are one of the ways to create greater overlap, as mentioned earlier, between two phases of production that may not be well connected.
Script notes contain valuable information about each take, as well as call attention to differences between setups and takes that might not be immediately apparent. They also can provide insights into what each setup is trying to achieve. And those insights can be useful to essentially every department in the process, from edit to sound to visual effects and color correction. They can make the difference between capturing necessary subtleties in the finished episode and missing out on some of the layers of the show (or creating inconsistencies that you’re unaware of).
Another important resource can be the editors of the show. Not only are editors potentially useful to producers, writers, or directors because of their familiarity with footage and past episodes of the show, but they also can be a great resource for each other. Multiple editors will often be working on separate blocks of a larger show, and the sharing of insights about footage, existing assets and show themes can often help each of them do their jobs better.
Always think of the big story.
When creating an episode of a show, it is normal to get very focused on the specific moments and details of that particular episode, or even a particular scene or moment. And because episodic television has isolated creative aspects in each installment, it’s sometimes helpful to take a step back and look at the big picture. This is obviously most important in serialized shows where there is a bigger story arc going on, but can also be helpful in procedural or installment-based shows. Keeping in mind how the details fit in with the overall direction of the series and what the show might look like in upcoming episodes and seasons can be a helpful approach. It also provides opportunities to create anticipation or hide fun clues between the lines. Always remember that you’re telling a big story as well as the small one.
Be consistent, but also don’t be afraid to take chances.
Every show has its stylistic signatures and patterns. But for a show to have longevity with an audience, it also has to evolve and even surprise once in a while, or it can lose its excitement. While it’s important not to depart from important aspects that give the show its identity, it’s also helpful to take some chances now and then that help keep things fresh and surprise the viewer. You create rules to set expectations. But you can break them to make a point and create a powerful moment. However, when you break rules, always do it for a reason that serves the bigger purpose of the character, story, or plot development. That bigger-picture view is what gives the show internal consistency even when you change things up a bit.
Be yourself. Let other people be themselves.
In any process that has layers of approval, it’s always tempting to try to guess what the next people in the pipeline are going to think about what you’ve created or helped create. But it’s important to resist the temptation to incorporate those guesses into your work. Each layer of approval is there for a different reason and serves an important purpose, including yours. Trying to anticipate and “correct” things that you find valuable but worry others might find problematic can become an unfortunate trap for a number of reasons.
The first problem with trying to anticipate feedback is that you’re simply guessing what other people might think. But people are subjective and surprise each other all the time. If you’ve guessed wrong, you may have compromised or changed the episode to compensate for a problem that never existed. The only person whose view you can represent accurately is your own. By replacing that with what you think someone else might think, you misrepresent their interests and potentially deprive the project of your own.
You were chosen for your job because of what you can add to the process. So make sure you’re giving the team that. Otherwise, you may end up with a double emphasis on the input of whomever you’re trying to anticipate and no real input from you. Others will happily provide their own suggestions and critiques when it’s their turn. In the meantime, be yourself, and recognize the value people are counting on you to add.
How much time do you have, and what matters most?
Television is usually created with a faster workflow than other forms of filmed entertainment. As a creator and artisan, you’ll be faced with seemingly impossible deadlines at times, and the need to make important choices on the fly. It can be very helpful to take a step back and assess what you can accomplish in the time you have, and then take stock of what matters most. Television episodes are riddled with flaws, but a strong production team usually manages to avoid the really problematic ones. A large part of that is being able to prioritize what really matters to the finished product and what only annoys the makers.
To make production and post-production run smoothly, it’s often useful to divide input or revisions into three categories: “must have,” “nice to have,” and “if there’s time.” Even if something is a major task, it would be an error to ignore the “must have” changes that are critical to the story and characters. Once those are complete, it’s time to move on to the “nice to have” list. Each of those will make the finished product better, so if you can get through them, you’ll end up feeling pretty darn good about the finished product. But don’t fall into the trap of making a number of easy-to-address “nice to have” fixes before the “must haves” are all sorted. Last, you can start to pick off the “if there’s time” items, comfortable in the knowledge that if you don’t get to all of them, it won’t be a disaster. That kind of process will help keep important things from slipping through the cracks during the hectic episodic television creation process.
How can you make the piece the best it can be?
Most importantly, keep in mind that the final goal is to create something that’s as exciting and entertaining as possible. Your ultimate goal is to make each episode the best piece it can be. Before you sign off on your work or give your approval, it’s always worth asking whether the elements you’re charged with are as good as they can reasonably be, and think about whether there are any obvious ways to make them better (within reason, of course).
In the end, you’re creating entertainment. And the ultimate goal is to capture your viewers’ minds and attention. Have you done everything you can to do that?
Make sure nothing slips through the cracks.
When the episode is finally finished and ready to go, it’s always useful to have extra sets of eyes look at everything. Each person in the process tends to look at things in a different way and with differing priorities. While the showrunner is most likely to catch problems with overall storyline and consistency, they may be less attuned to details on the audio track. And the editor is more likely than the colorist to notice oddities in scene transitions. So giving everyone the chance for a final once-over is always good practice.
Another good practice is to have people watch the final product on a variety of different setups. Something might sound great on a theatrical mix stage in Dolby Atmos but not work the same way when played on a laptop or older television. Or a critical plot element might be visually obvious on a giant theatrical screen but not read properly on a phone. Yet there will be audience members watching on all of those platforms. It’s always good practice to not only view your finished piece on the best possible equipment but also on the most common lesser equipment that your viewers are likely to use. See your show as they will see it, and you’ll be sure you know what their experience is like.
Part 3 Recap:
Understand and take advantage of the distinct strengths of block shooting or individual episode production.
Use all available references and resources to keep things cohesive, including show bibles, story meeting notes, visual and stylistic references, and even past episodes to keep the whole team on the same page.
Script notes and editor insights on the footage can solve a lot of unforeseen problems.
Always take a step back and consider the largest arc of the show. Consider whether your choices fit with the big picture.
Be consistent with the show’s voice, but don’t be afraid to take chances. This is the only way to keep a show fresh and engaging.
Make the creative choices you think work best for the show. Don’t try to preemptively overcorrect for what you think other stakeholders might say about a cut. Other team members can be their own advocates. Your job is to be you.
TV moves fast. Be realistic about what you can accomplish. Prioritize your battles and do the things that will have the greatest importance and impact for the viewer first.
Don’t forget final checks. Yours may be the last eyes that catch a slip-up.
Always watch the finished piece on a variety of formats and equipment. The home audience won’t always have the perfect studio you do, and you need to make sure the show works on mobile or a laptop. Critical picture elements need to work on a small screen, and the mix should be intelligible on any speakers.
Read the entire 3-part guide to Making Memorable Television now.
MediaSilo allows for easy management of your media files, seamless collaboration for critical feedback and out of the box synchronization with your timeline for efficient changes. See how MediaSilo is powering modern post production workflows with a 14-day free trial.
The return of conferences and exhibitions in 2022 has finally given us all the opportunity to sit down and talk to industry professionals from around the world to discuss what’s working and where the current challenges lie.
Many of the conversations I’ve had at these events relate to the industry hot topic at the moment: remote production. This topic takes on many forms depending on the needs of the production and so to tackle them in a single blog would be ambitious (for me to write and for you to read). So instead, I thought I would cover a more specific scenario to show the sort of challenges I’ve heard and illustrate some of the techniques that can be applied to other scenarios.
Take for example a production company responsible for a popular reality TV show. Let’s say it’s set, and shot, in the south of France, although the production company itself is based in Paris, 500km to the north.
Like all reality shows, it generates a huge amount of content from many cameras running non-stop. It also has an extremely fast turnaround, with audiences expecting high production values in programs reflecting the action that took place on site within the previous few hours.
To meet these two requirements, the production company could have set up a large server network on site. Let’s explore some of the implications of this and what alternatives could be used to improve the workflow.
On-Site Production Challenges
In a single storage network scenario the program would have to base a team of editors at the location. This would add substantially to the production budget: these editors, edit assistants and edit producers would need accommodation and food over the months that the program was in production. Space would have to be rented to house the edit suites. Travel costs would be high because editors may not want to be away from home for extended periods of time, therefore they would be constantly rotated in and out.
What the production company needs is the ability to edit story packages, and packages into programs, within the facilities they already have in Paris (close to the homes and favorite restaurants of the editors and producers). However, the content is hundreds of kilometers away.
Bring On The Proxy
I’ve written before about how you should embrace the proxy. When content is ingested into EditShare storage nodes it can automatically generate a proxy, at a bitrate determined by you, but small enough to be regarded as portable.
This means that users anywhere with the right privileges can log in, view the proxies, add comments if necessary, and manage the content. In this application, producers responsible for each story strand could log in, from Paris for example, whether from a computer or tablet, and review all the footage available. They could very quickly identify what material to use and drag it into an appropriate bin. This can all happen in a web browser using the FLOW media asset management system. We are nowhere near an edit workstation yet.
An edit assistant could then go through the selected sequences for the story and set up the bin structure for the editor. Again, this is still in a web browser, at any location, using the proxy.
When everything is ready, the relevant clips are loaded into the edit software. We are completely agnostic: we can preload bins and projects into Adobe® Premiere® Pro, Avid Media Composer and Da Vinci Resolve. The editor can start cutting straight away.
Stay In Sync
With EditShare EFS we recently introduced a new feature called Swift Sync. This is designed to synchronize content between multiple locations. It incorporates file acceleration which can move media files, over a leased line or a VPN tunnel, as much as ten times faster than Rsync.
It also is extremely flexible in what it synchronizes. In an application like the reality show example, there may still be too much raw content to reliably move, even after the selections have been made. We have smart segmentation in mind during this process as it’s not necessary to synchronize absolutely everything. The key is to synchronize what’s required, automate and optimize. So the editor can cut on the proxies, and only when the story is complete, will Swift Sync move the required clips with handles. It can even conform the edit in the server node at the location and just move the finished story as one file.
Savings Abound
This is the architecture that can deliver huge operational savings for the reality show, while maintaining quality and boosting productivity. The same ideas are applicable for other situations too.
You do not need to have physical storage nodes in both the remote location and back at base. One or both of them could be in the cloud, using EditShare FLEX software and the AWS Backbone to move material as needed.
If you are shooting a drama in 4K Ultra HD, or even higher resolutions using RED cameras, it might even be most efficient and cost-effective to edit using proxies and deliver the selected raw clips back to base on disk drives using FedEx.
At EditShare we see our mission as supporting producers to create amazing everywhere. Proxy workflows are a practical and very flexible way of achieving that.
Want to find out more? click here to book a demo, or a chat with your local EditShare team member.