

Remote production has become an attractive proposition, with multiple benefits. The challenge, though, is to provide sufficient connectivity to allow the production and post production teams access to content in a timely manner.
In this short blog piece, EditShare’s CTO, Stephen Tallamy, runs through some of his top tips for making remote editing more productive.
1 – Get Organized Remotely
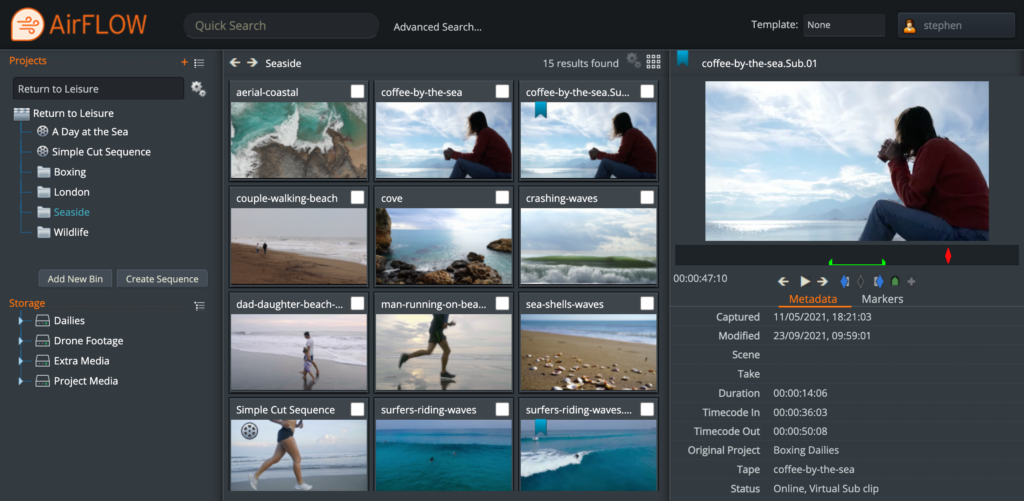
In a remote editing set-up, the editing software is on your computer but the raw footage is on a server at a remote location. It might be the broadcaster or production company’s headquarters, in the cloud, or if you’re involved in fast turnaround editing it might still be at the location of the shoot.
To minimize the download time, I recommend your first task is to organize the clips and decide what you need directly on the server. To make this easy you’ll ideally use a web-based tool to start building up your project structure. EditShare’s award-winning FLOW software has built-in web tools that allow you to easily drag and drop material into bins, create sub-clips and even create a rough timeline and cuts-only edit before you start downloading.
This will have two benefits. First, you get your material and can start working faster. Second, you have fewer clips to download to your computer, so you can be more productive. Especially if you already have a rough timeline mapped out.
2 – Embrace the Proxy
What are proxies? They are reduced resolution versions of clips, which make it easier for the editing software to run seamlessly on your computer. We all use them every single day, without even thinking about it. It’s what we generally look at when we are in the edit software – a scaled rendering of the original media.
Unless you’re working on the finest details of the image, you don’t need to worry about the full resolution versions.
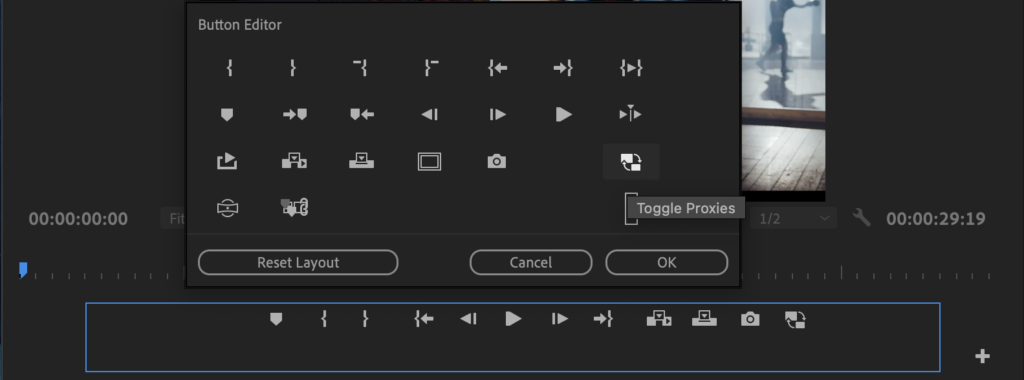
If you do have full resolution content available in your editor, then don’t forget that Premiere Pro allows you to toggle between looking at the proxy and the full resolution with a single click of the mouse. If the toggle proxy button is not there, below the source or the program monitors, then click on the + button to reveal it. Once you have the toggle control, you can switch instantly into full resolution to check a detail, then back to the proxy for smooth playback.
3 – Centralize the Proxy Creation
This is the logical extension of tips 1 and 2. In standalone editing, you import the full resolution material and your software creates the proxies. This takes time and processing power.
But if you organize your material in advance on the server, you only need to download the proxies, saving even more bandwidth and download time.
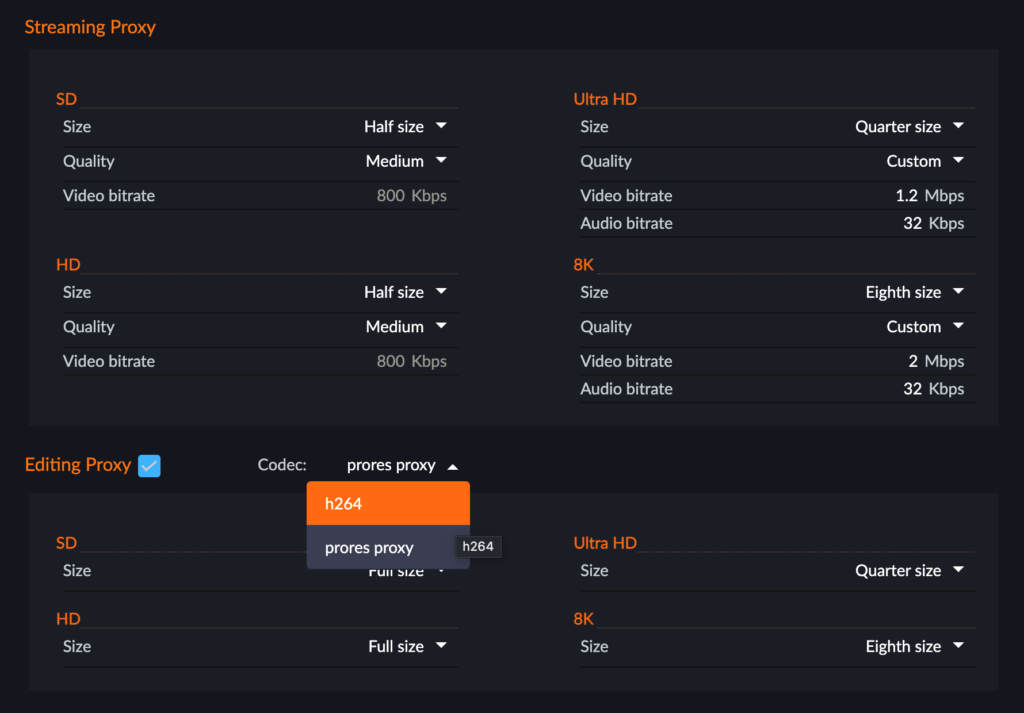
FLOW actually has two types of proxies. You can determine whether you want one or both, and set parameters, on a project by project basis.
The first is what we call the “streaming proxy”, which is an MPEG-4 file designed to be lightweight for internet delivery. It can start with a 4K or 8K file and still deliver a compact proxy.
The second is an “editing proxy”, which is in H.264 or ProRes, and supports multiple audio tracks, in a wrapper recommended by Adobe for seamless use of the proxy toggle feature. But while it is designed for maximum flexibility in editing, you can work perfectly well with streaming proxies if you have a simple audio layout in your original media.
4 – Plug In To Adobe® Premiere® Pro
Working in a web tool can be great during the organization stage, when it gets down to the edit you really want all your focus on the job in hand. You want to stay inside your editing software.
One of the great benefits of using Premiere Pro is that Adobe actively encourages open interfaces, which in turn means that developers like EditShare can provide very tight integration. We’ve put a FLOW panel into Premiere Pro, so all the things I have talked about, like organization in advance and selecting what proxy to use, can be done within the familiar user interface.
The EditShare panel also allows you to send your work in progress, as a proxy, to a producer, who can make comments tagged to markers in the timeline. It’s a fast and seamless way to work towards approval.
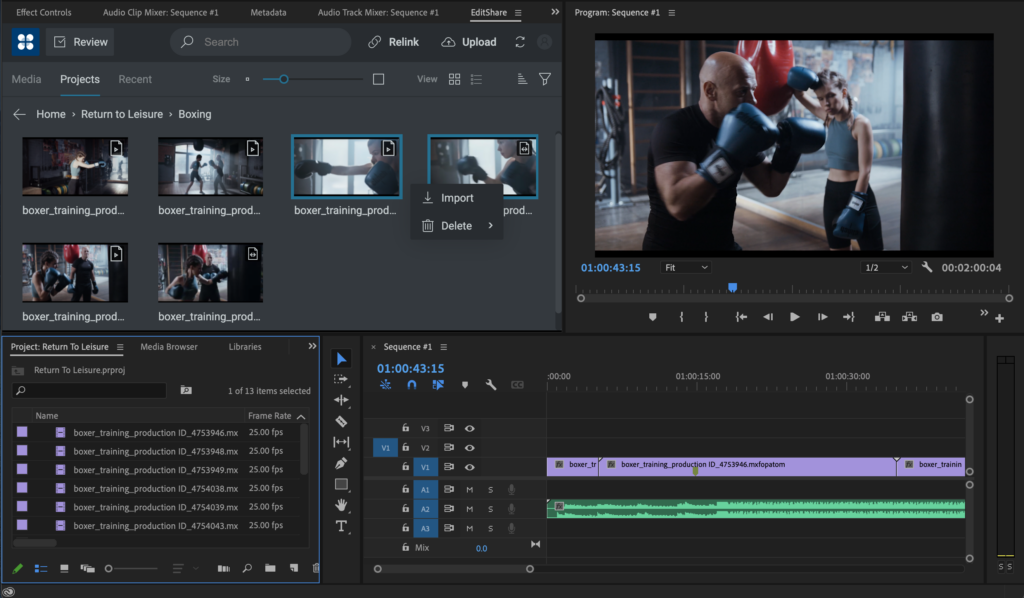
Finally, that same panel gives you relinks to the original footage, should you need it, which leads naturally to…
5 – Finishing the Job
At the end of the project you need to conform it: finalize the edit with all its transitions and effects using the full resolution originals, and output to the final format.
If it’s a prestige project, the editor will want to check the final output. So, you relink to the original footage and download only the parts of the project you need for the edit.
But if speed is of the essence, then you upload the EDL to a remote renderer or Adobe Media Encoder hosted on the server. You upload a very lightweight file, and the heavyweight processing power of the server speeds the rendering. This is ideal, for example for sports highlights packages.
These are just a few thoughts on how remote editing can be smooth, seamless and productive. For a glimpse of how it works in practice, you can watch our short YouTube video at: https://www.youtube.com/watch?v=DahAtBLMZbg
To chat to an expert or start your journey to remote editing click here to get started: https://editshare.com/get-started/
